
Image formats: Codecs and compression tools
If you missed the previous posts in this series, start with the Part 1: Color models for humans and devices and Part 2: Pixel data from encoders to decoders. They covered the basics of image compression. Now, in this final part, we'll take a more hands-on approach. We'll run some experiments with different codecs and compression techniques, and check out some useful tools for building your own image pipeline.
Let them compete
Let's consider a popular topic of discussion: "Is the JPEG format still the best for image compression?"
Unfortunately, there is no clear answer. Every task has its own unique context. Do you want to optimize the encoding speed? Or do you need to serve high-resolution photos for professional photographers? What if you are storing a bank of screenshots or rasterized vector graphics?
When deciding which compression method to use for your images, experiment a little to find what best suits your needs. As with any system, it's always a good idea to start with a clear list of requirements — both functional (what the system should do) and non-functional (important system metrics).
You might want to think through some of these questions:
- What types of images are you working with? Are there animals (be aware of fur and feathers), maps, rasterized HTML elements, or vector graphics? They all behave differently.
- What is the size of your image? Do you need to show large images (more than 1000 px on one side) or thumbnails?
- Who are your end users and what devices do they use? Are you targeting mobile users?
- What is your budget for image processing? Do you have a lot of images to handle?
- What about encoding speed? If you use on-the-fly image compression, you might prefer faster encoding over better compression. Your compression method will also affect costs of encoding. Try several options and do some quick, back-of-the-envelope calculations.
- What level of quality do you need? If your application works with professional images, you might want to use lossless formats or formats that support higher bit depths and richer color spaces.
- How does the image look at the quality you need? For example, if you want to use low-quality images, AVIF can give impressive results. However, AVIF applies filters that may smooth out some details like fur or hair.
- What tools are systems are you working with? If you must use an existing system or tool, consider how well it meets your needs. For example, you may use an image processing tool but it may not support the format or parameters you want.
Note: We're not considering vector graphics here. They represent a whole different world with their own set of technologies and unique challenges. We'll focus only on raster images for this article.
Typically, you will consider several tools that might or might not be available for your project, and then decide which format and codec to use. At that point, it's very important to understand what you mean by "image quality". As we'll see later, it's very difficult to assign a quality to an image or even decide which image is better.
You also need to remember that the encoded result depends on several factors:
- The image itself.
- The codec you use.
- The parameters you send to the codec.
For example, as we saw in the previous section, any codec can easily compress a black rectangle, but for every codec, compressing white noise is challenging.
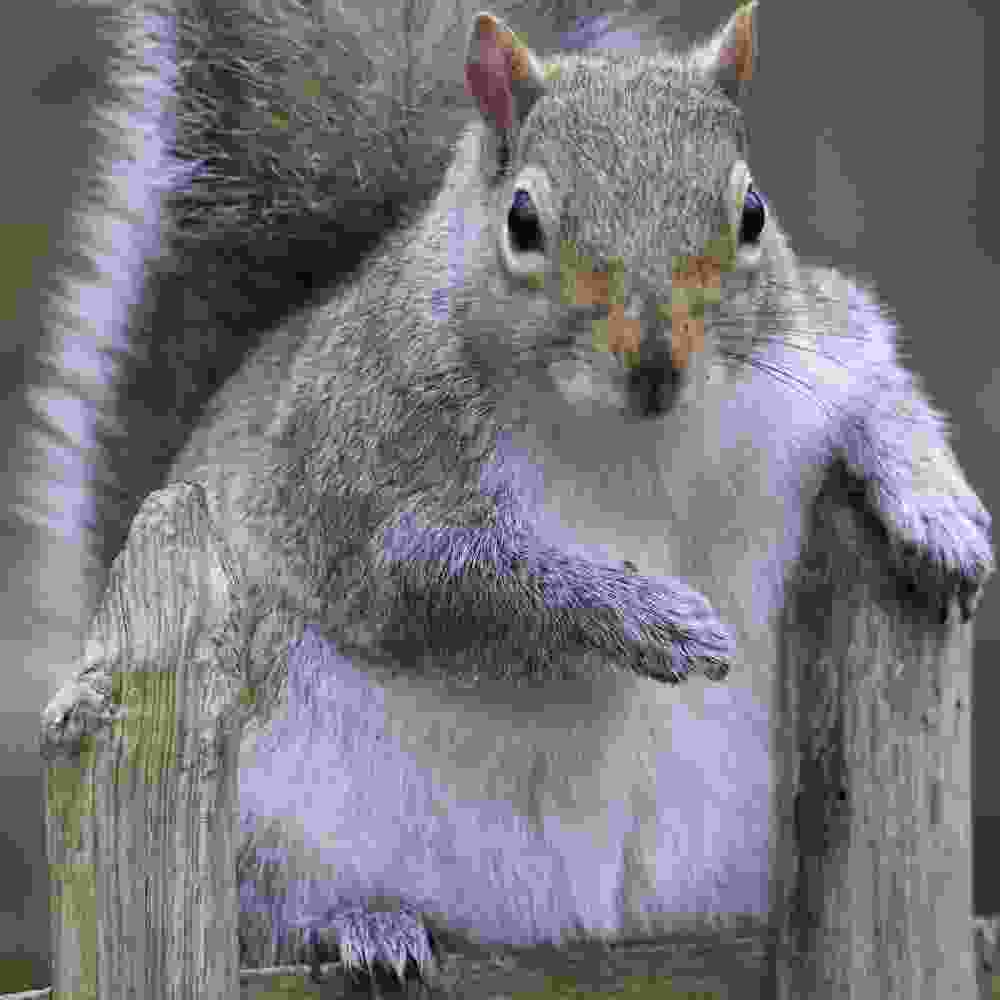
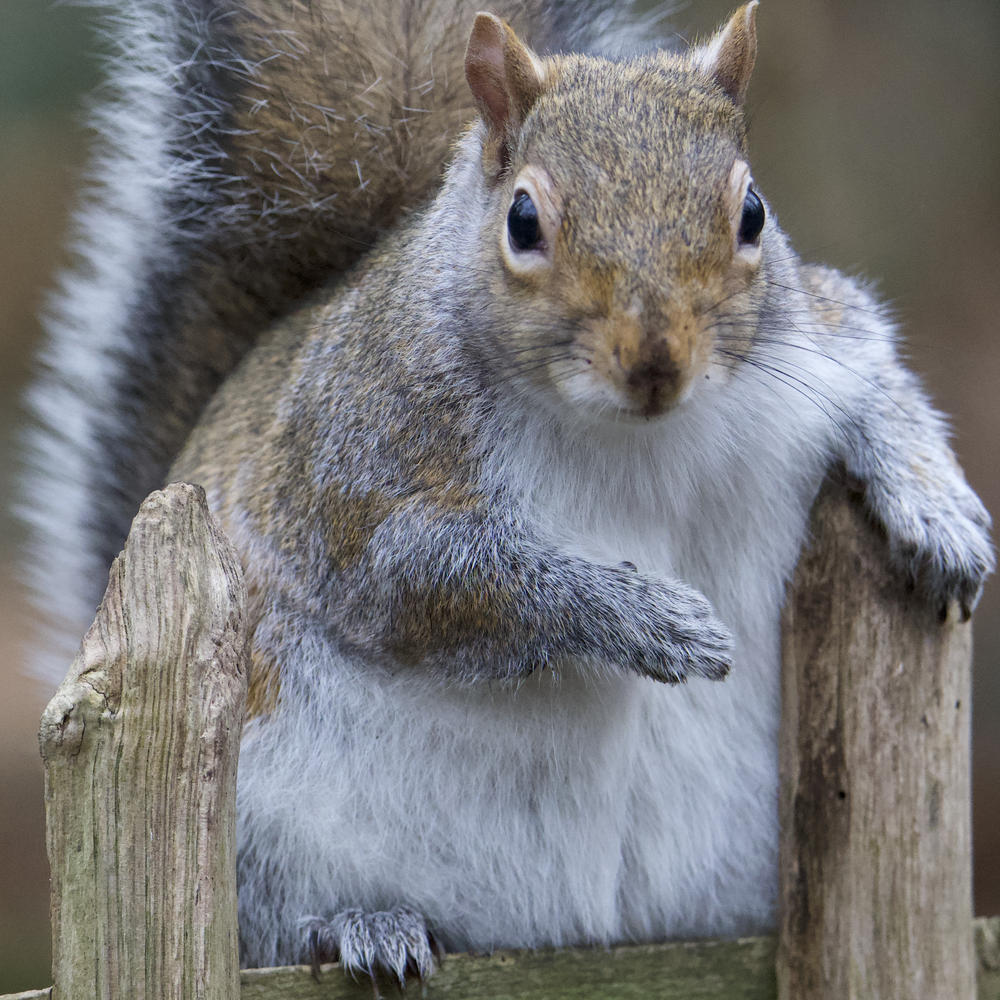
Compressing a squirrel
Let's walk through an example to see how you can assess requirements, explore the available options, and make informed trade-offs (you won't need to dive this deep for your own project 🙂).
Assume that we have a website with a squirrel image, and we want to show the best possible version of it to our users. We have a raw source image that is 2733 × 3727 pixels with a 16-bit depth. Unfortunately, the file size is around 50 MB, which is a little more than we expected.
Assume that for some reason, we can use only JPEG or AVIF.
Let's try to pick the best quality and codec parameters for our final image. At this point, we're absolutely sure that we don't want to resize the image.
To pick the best quality, we'll do the following experiment: compress this image with both AVIF and JPEG codecs 100 times. Each time, we'll increase the quality parameter by 1; we'll start from 1 and go to 100.
Note: It's a bad idea to draw conclusions based on only one image. To make reliable estimates, we need a dataset of images and statistically significant results to compare.
We plotted the results and found that AVIF performs much worse — it generates a much larger file size for the same quality as compared to JPEG.
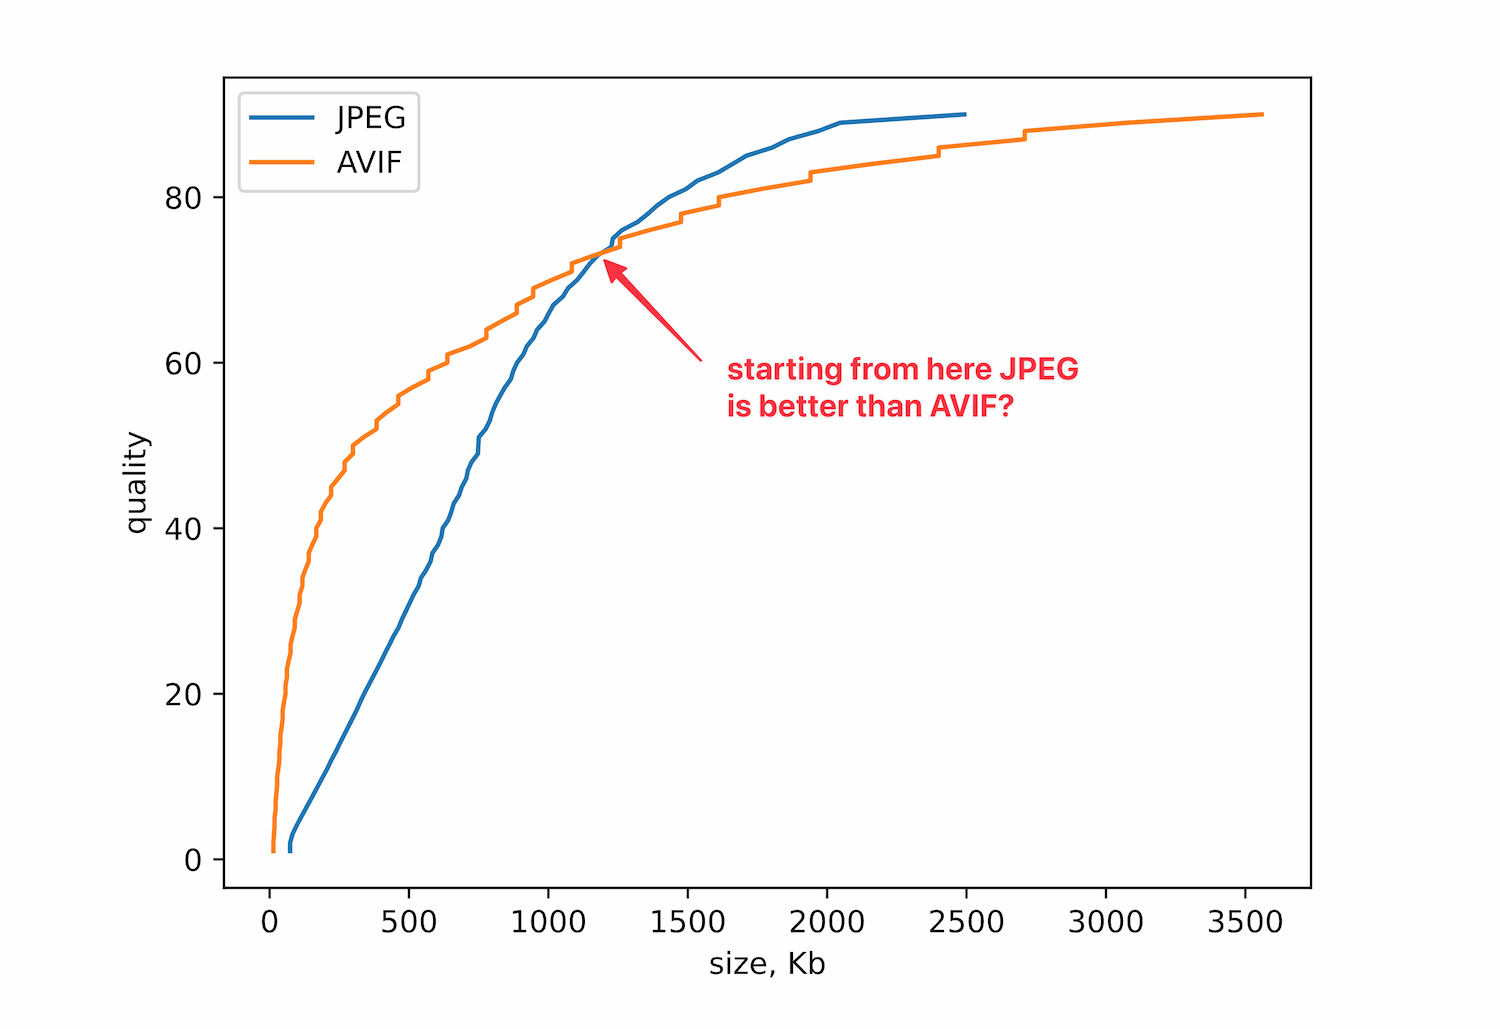
You might spot several problems with this conclusion. What codec parameters did we use? Could our comparison be wrong? Let's look at the logs of the AVIF encoder:
AVIF to be written: (Lossy)
 * Resolution     : 2733x3727
 * Bit Depth      : 12 <-- aha!
 * Format         : YUV444 <-- aha!
 * Alpha          : Absent
 * Range          : Full
 * Color Primaries: 2
 * Transfer Char. : 2
 * Matrix Coeffs. : 6
 * ICC Profile    : Present (544 bytes)
 * XMP Metadata   : Present (5028 bytes)
 * Exif Metadata  : Present (942 bytes)
 * Transformations: None
 * Progressive    : Unavailable
Looks like we disabled downsampling and used 12-bit depth. Let's fix this and set 8-bit depth with 4:2:0 subsampling for both codecs.
Note: In a real-world scenario, you should ideally experiment with all option combinations instead of reducing the codec parameters.
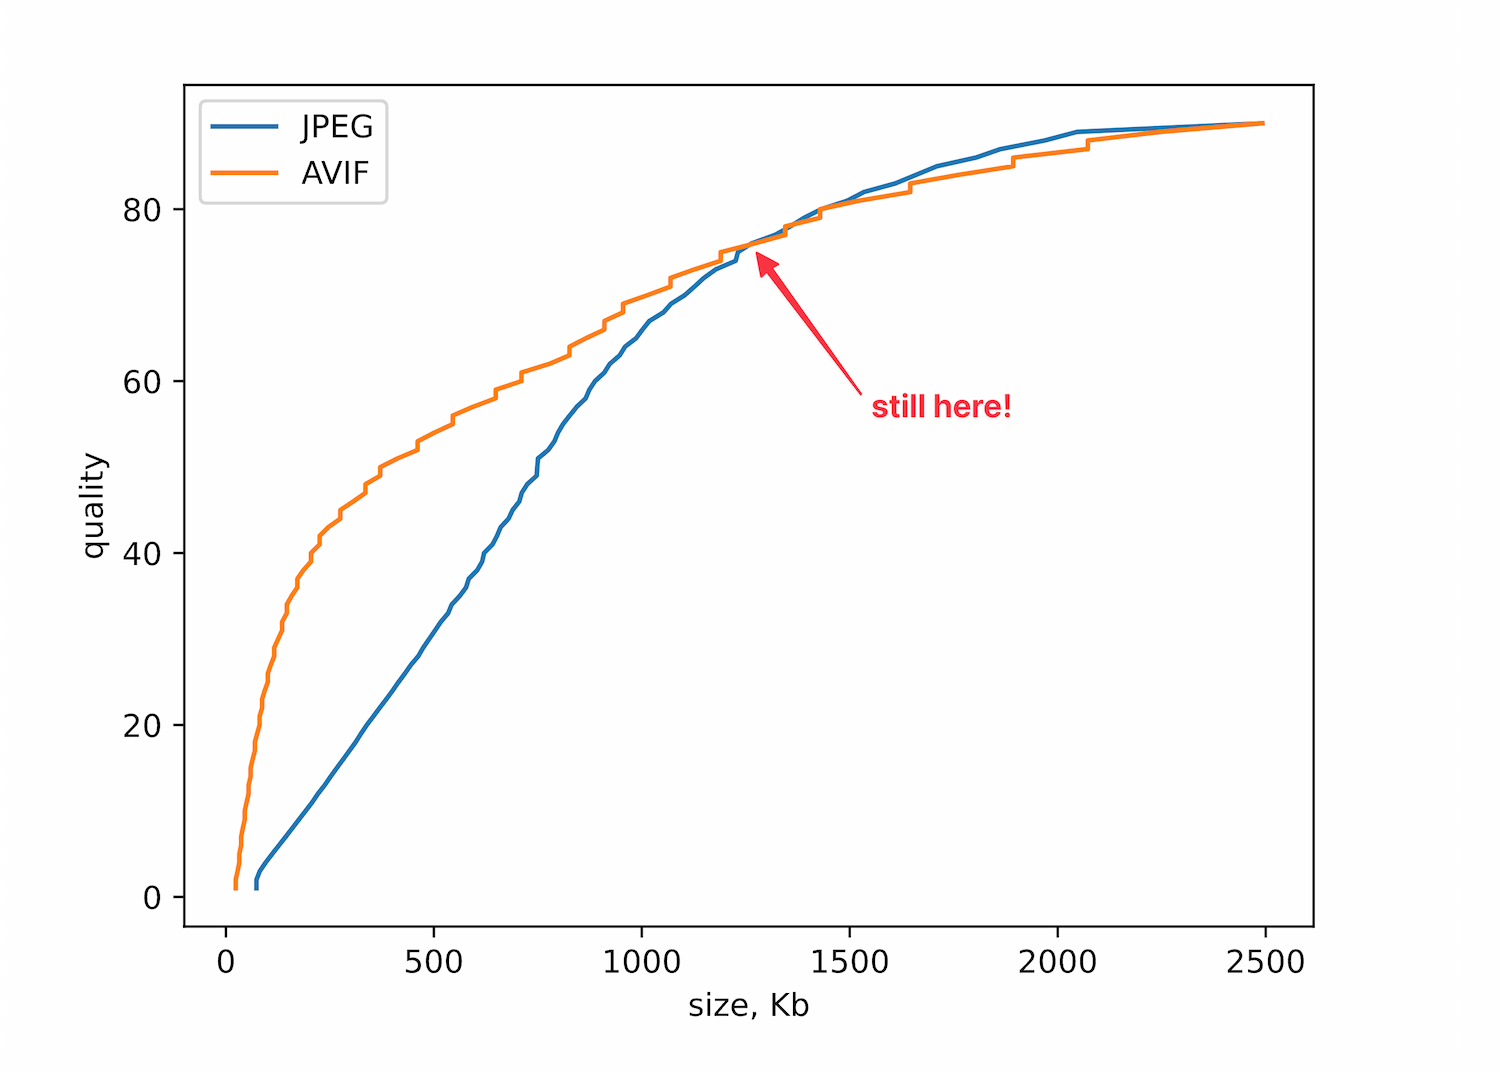
We can observe that things changed, but JPEG still wins. How is that possible?
If you read the previous posts in this series, you'd recall that the number we pass to the encoder for AVIF is not the same for JPEG. We are comparing incomparable entities.
So, we need a metric for "real quality". The first attempt is to compare images pixel by pixel. There is a special metric for this called the mean squared error (MSE). However, it doesn't work well for comparing compression results. MSE is a "lower-is-better" metric; 0 means that images are identical. Unfortunately, MSE doesn't work well. If we accidentally introduce a few very different pixels, the error becomes large. It also doesn't take into account image structure, color, or luminance, and it weakly penalizes large amounts of noise.
There is another metric called peak signal-to-noise ratio (PSNR), which is still widely used. It is calculated differently but suffers from the same problems as MSE.
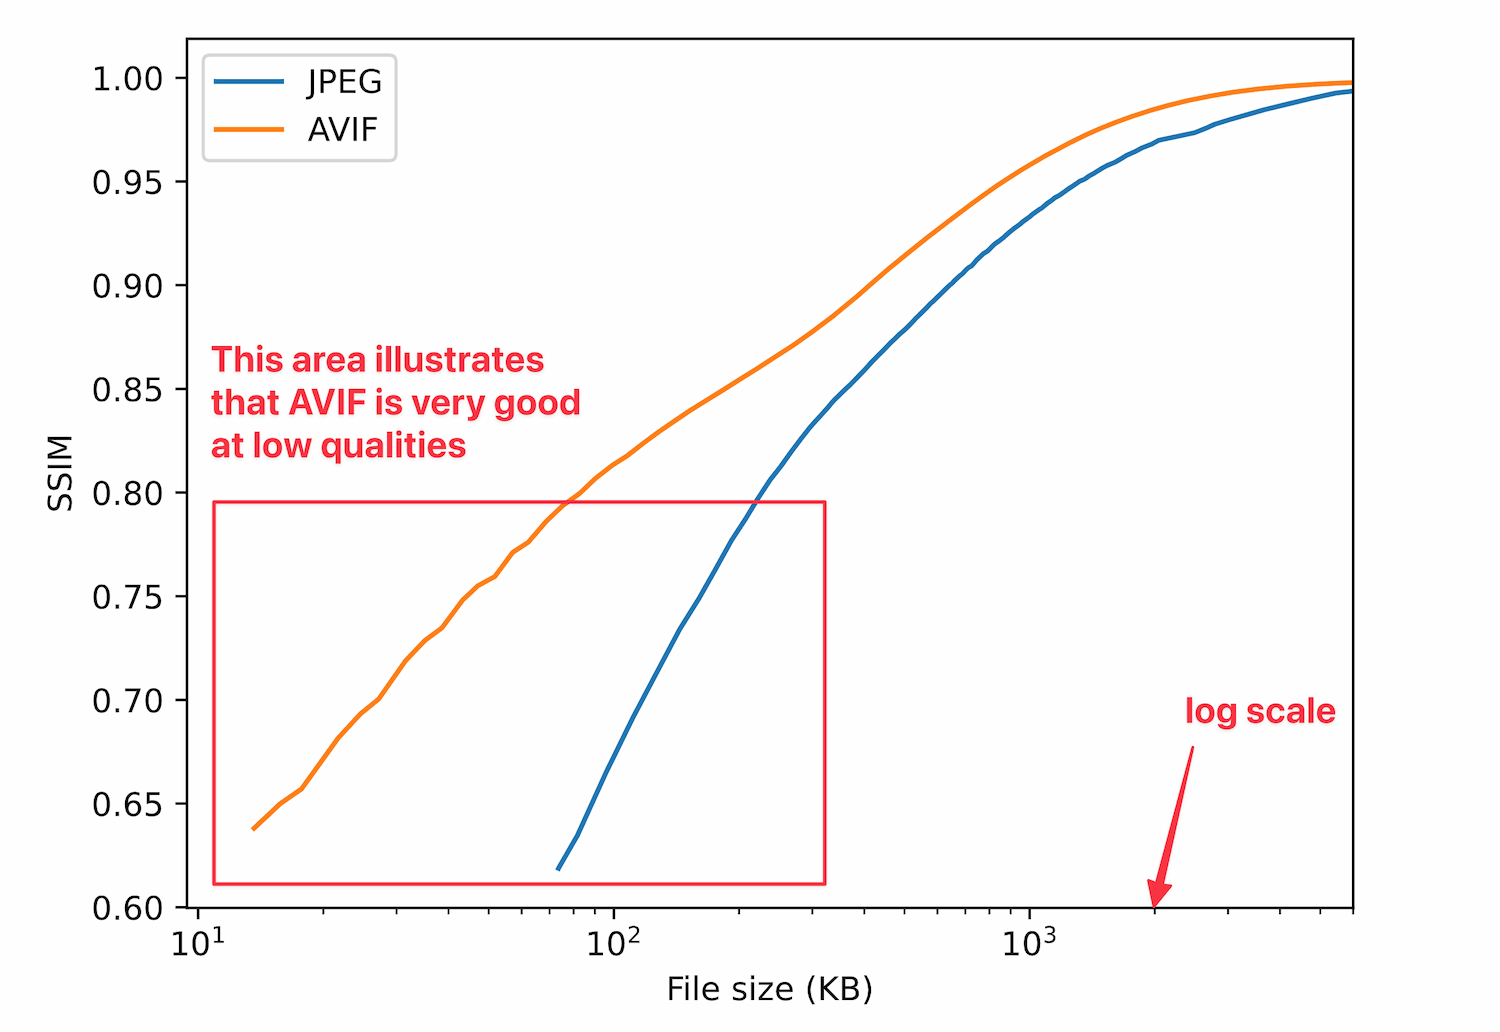
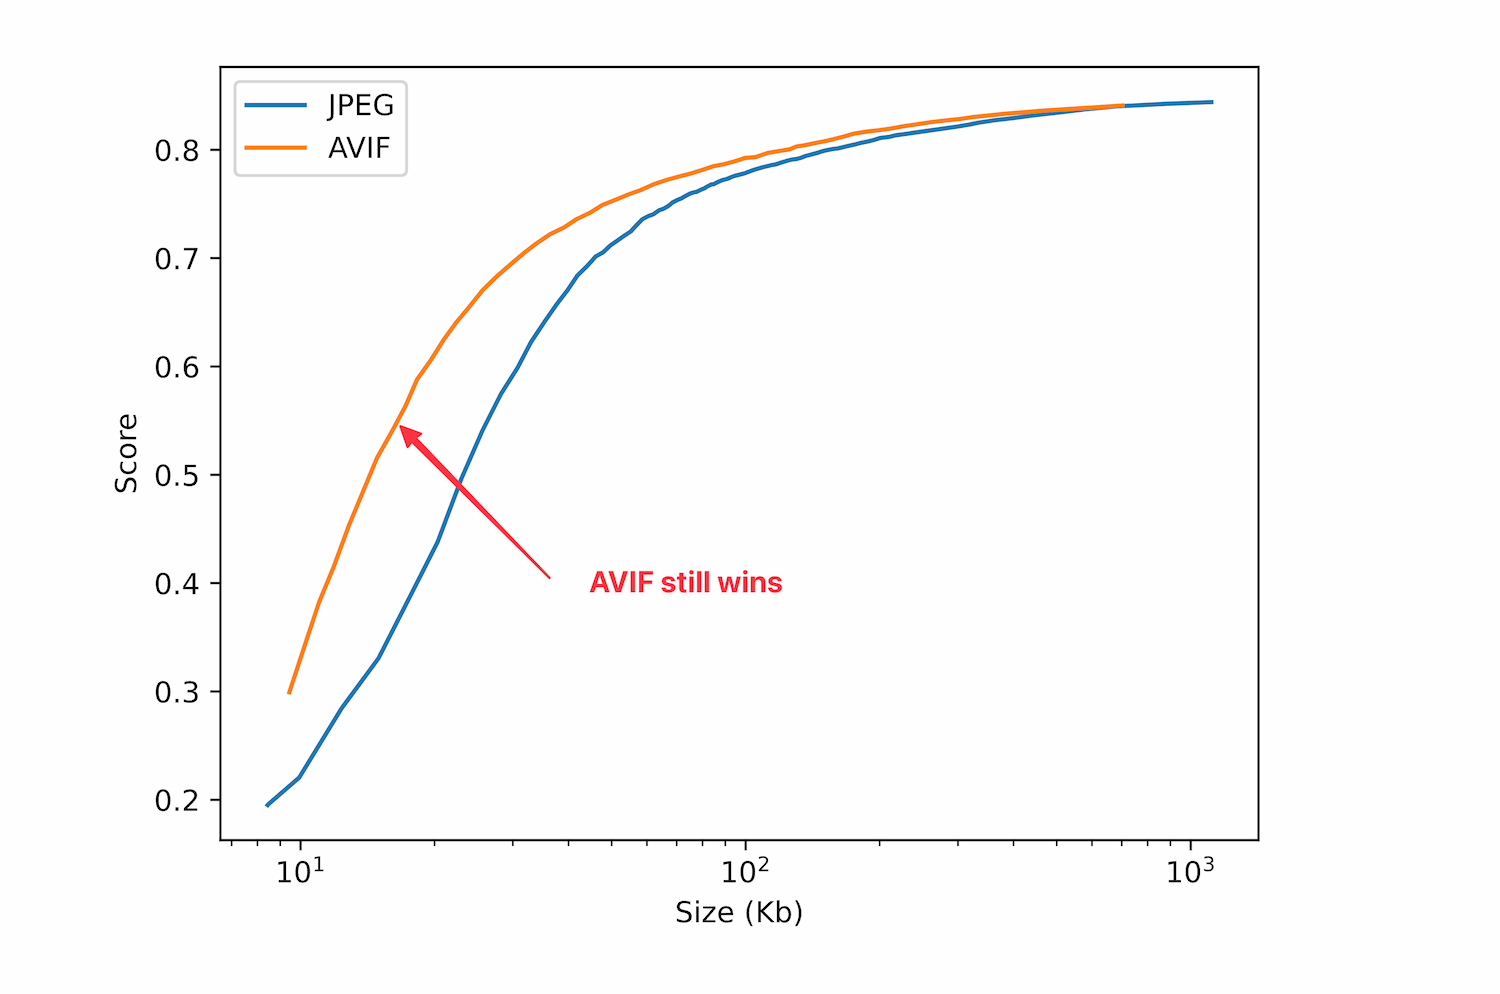
A better option is structural similarity index measure (SSIM). This metric tries to mimic human perception and other aspects we discussed in the previous section. Without diving into details, SSIM divides an image into small overlapping blocks. For every block, it estimates the difference in luminance, contrast, and structure and then averages the result for all patches. SSIM is a "higher-is-better" metric; 1 means that images are the same.
Let's apply this metric to our experiment. We happily get expected results. According to the graph, AVIF shows a significant advantage over JPEG, especially for low-quality images. The orange line (AVIF) is higher, which means it gives better SSIM for the same file size. We apply log scale to x-axis to make the graph more readable.
Of course, all these mathematical metrics may not suit your task.
Compressing a crow
Let's consider another example. Here's the original image of a crow:
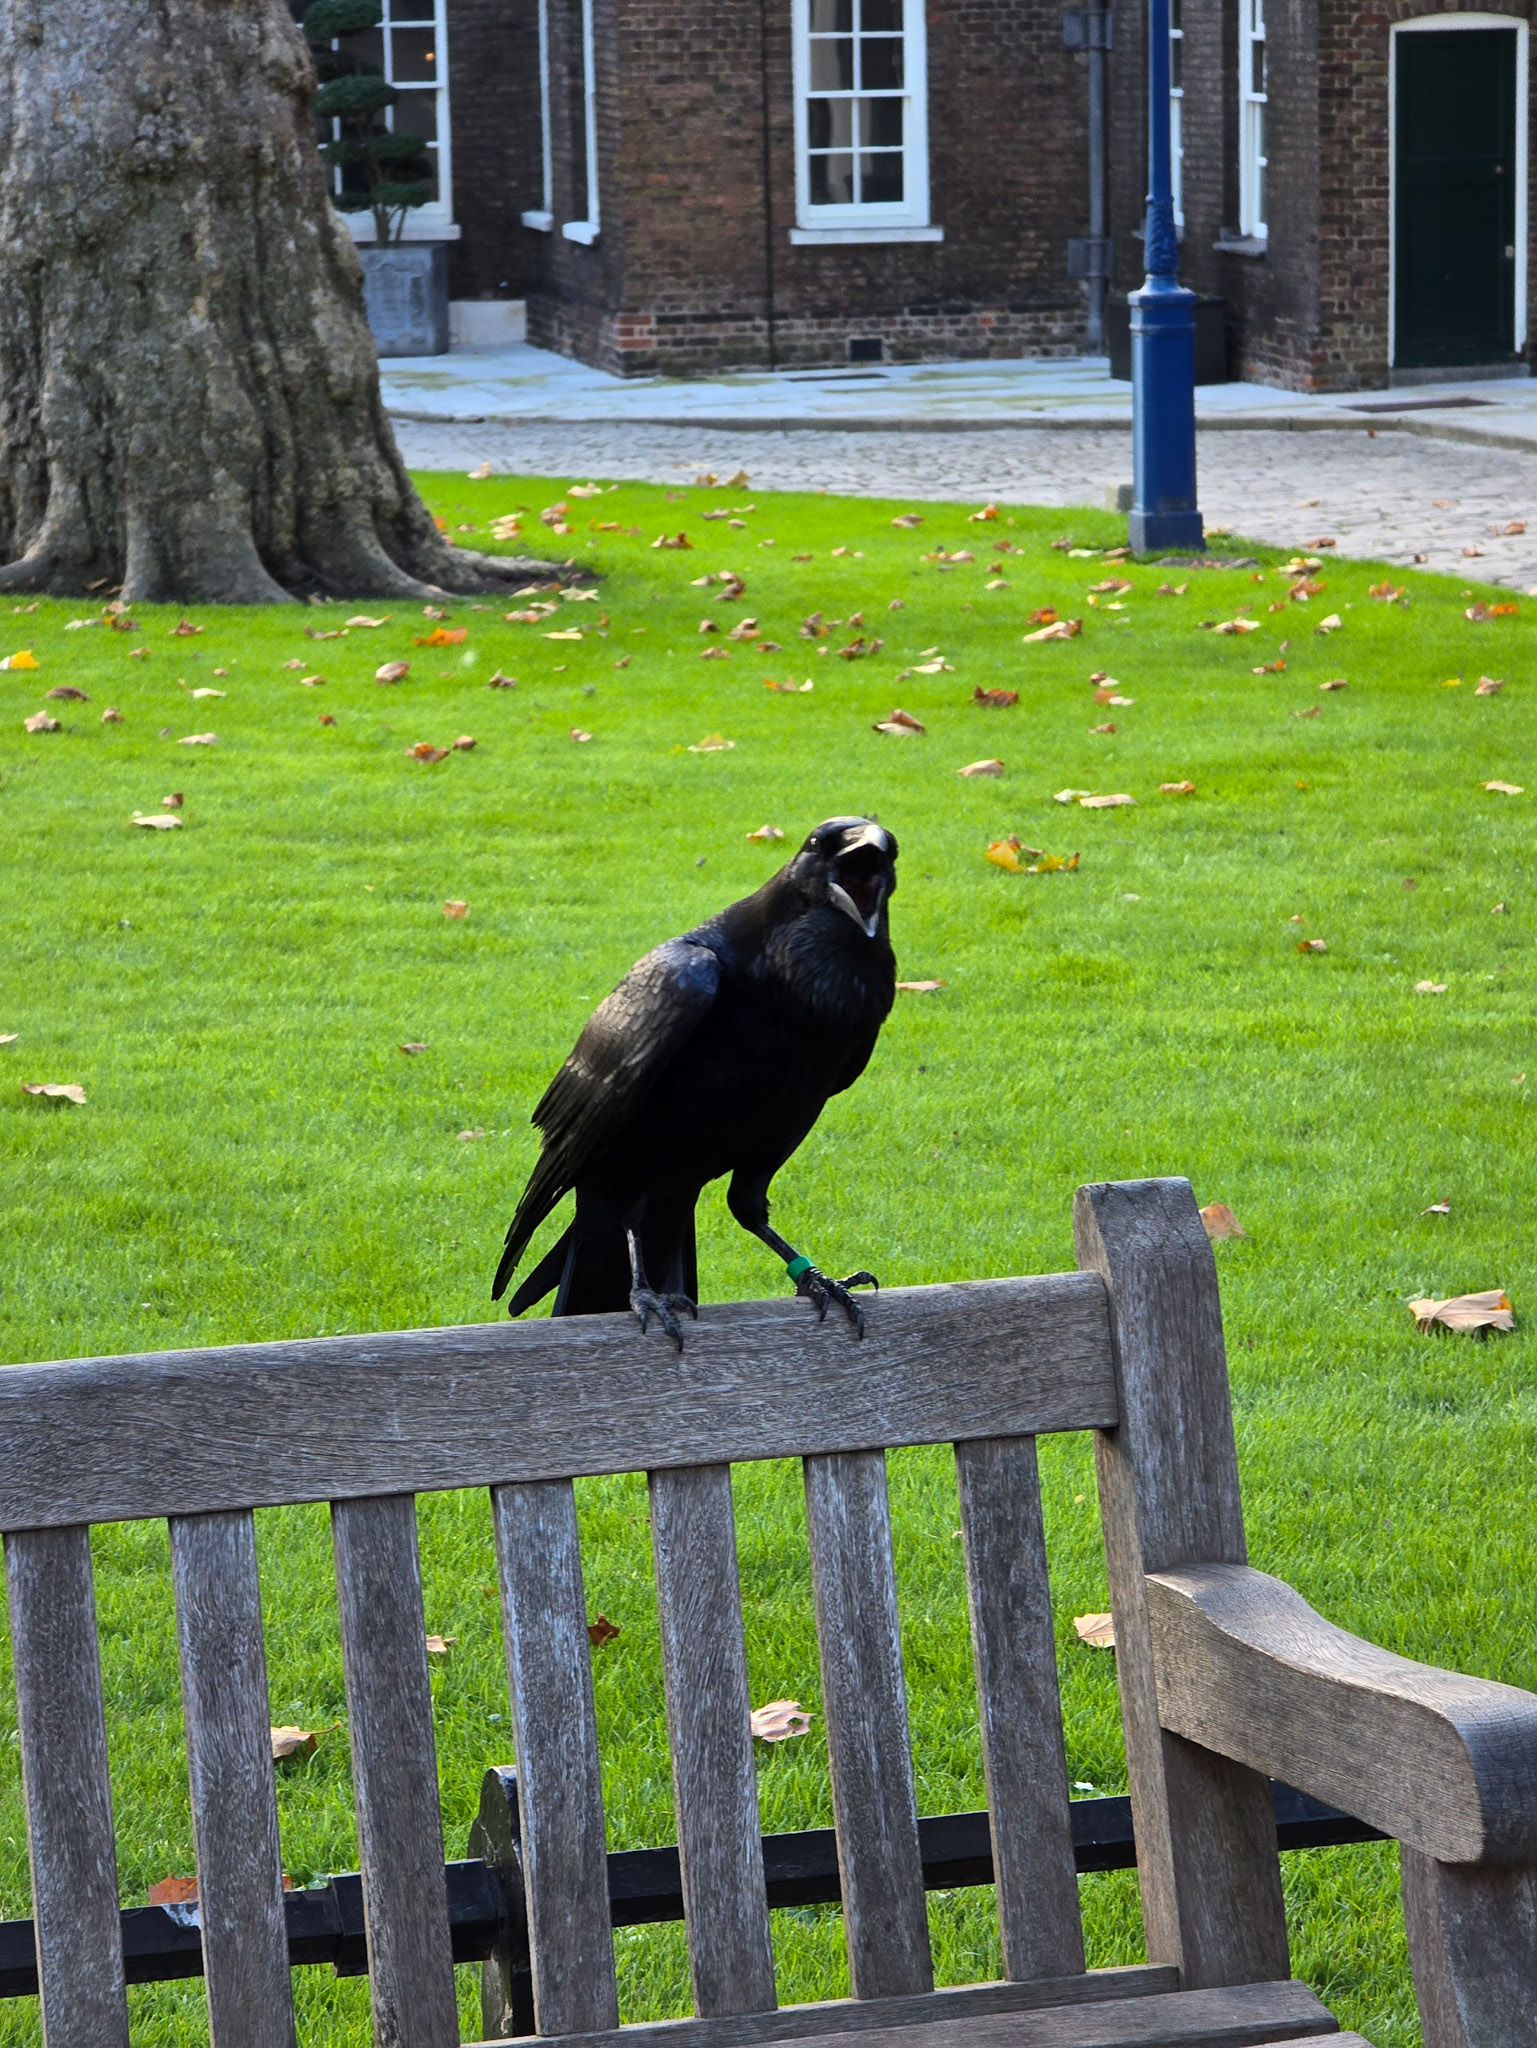
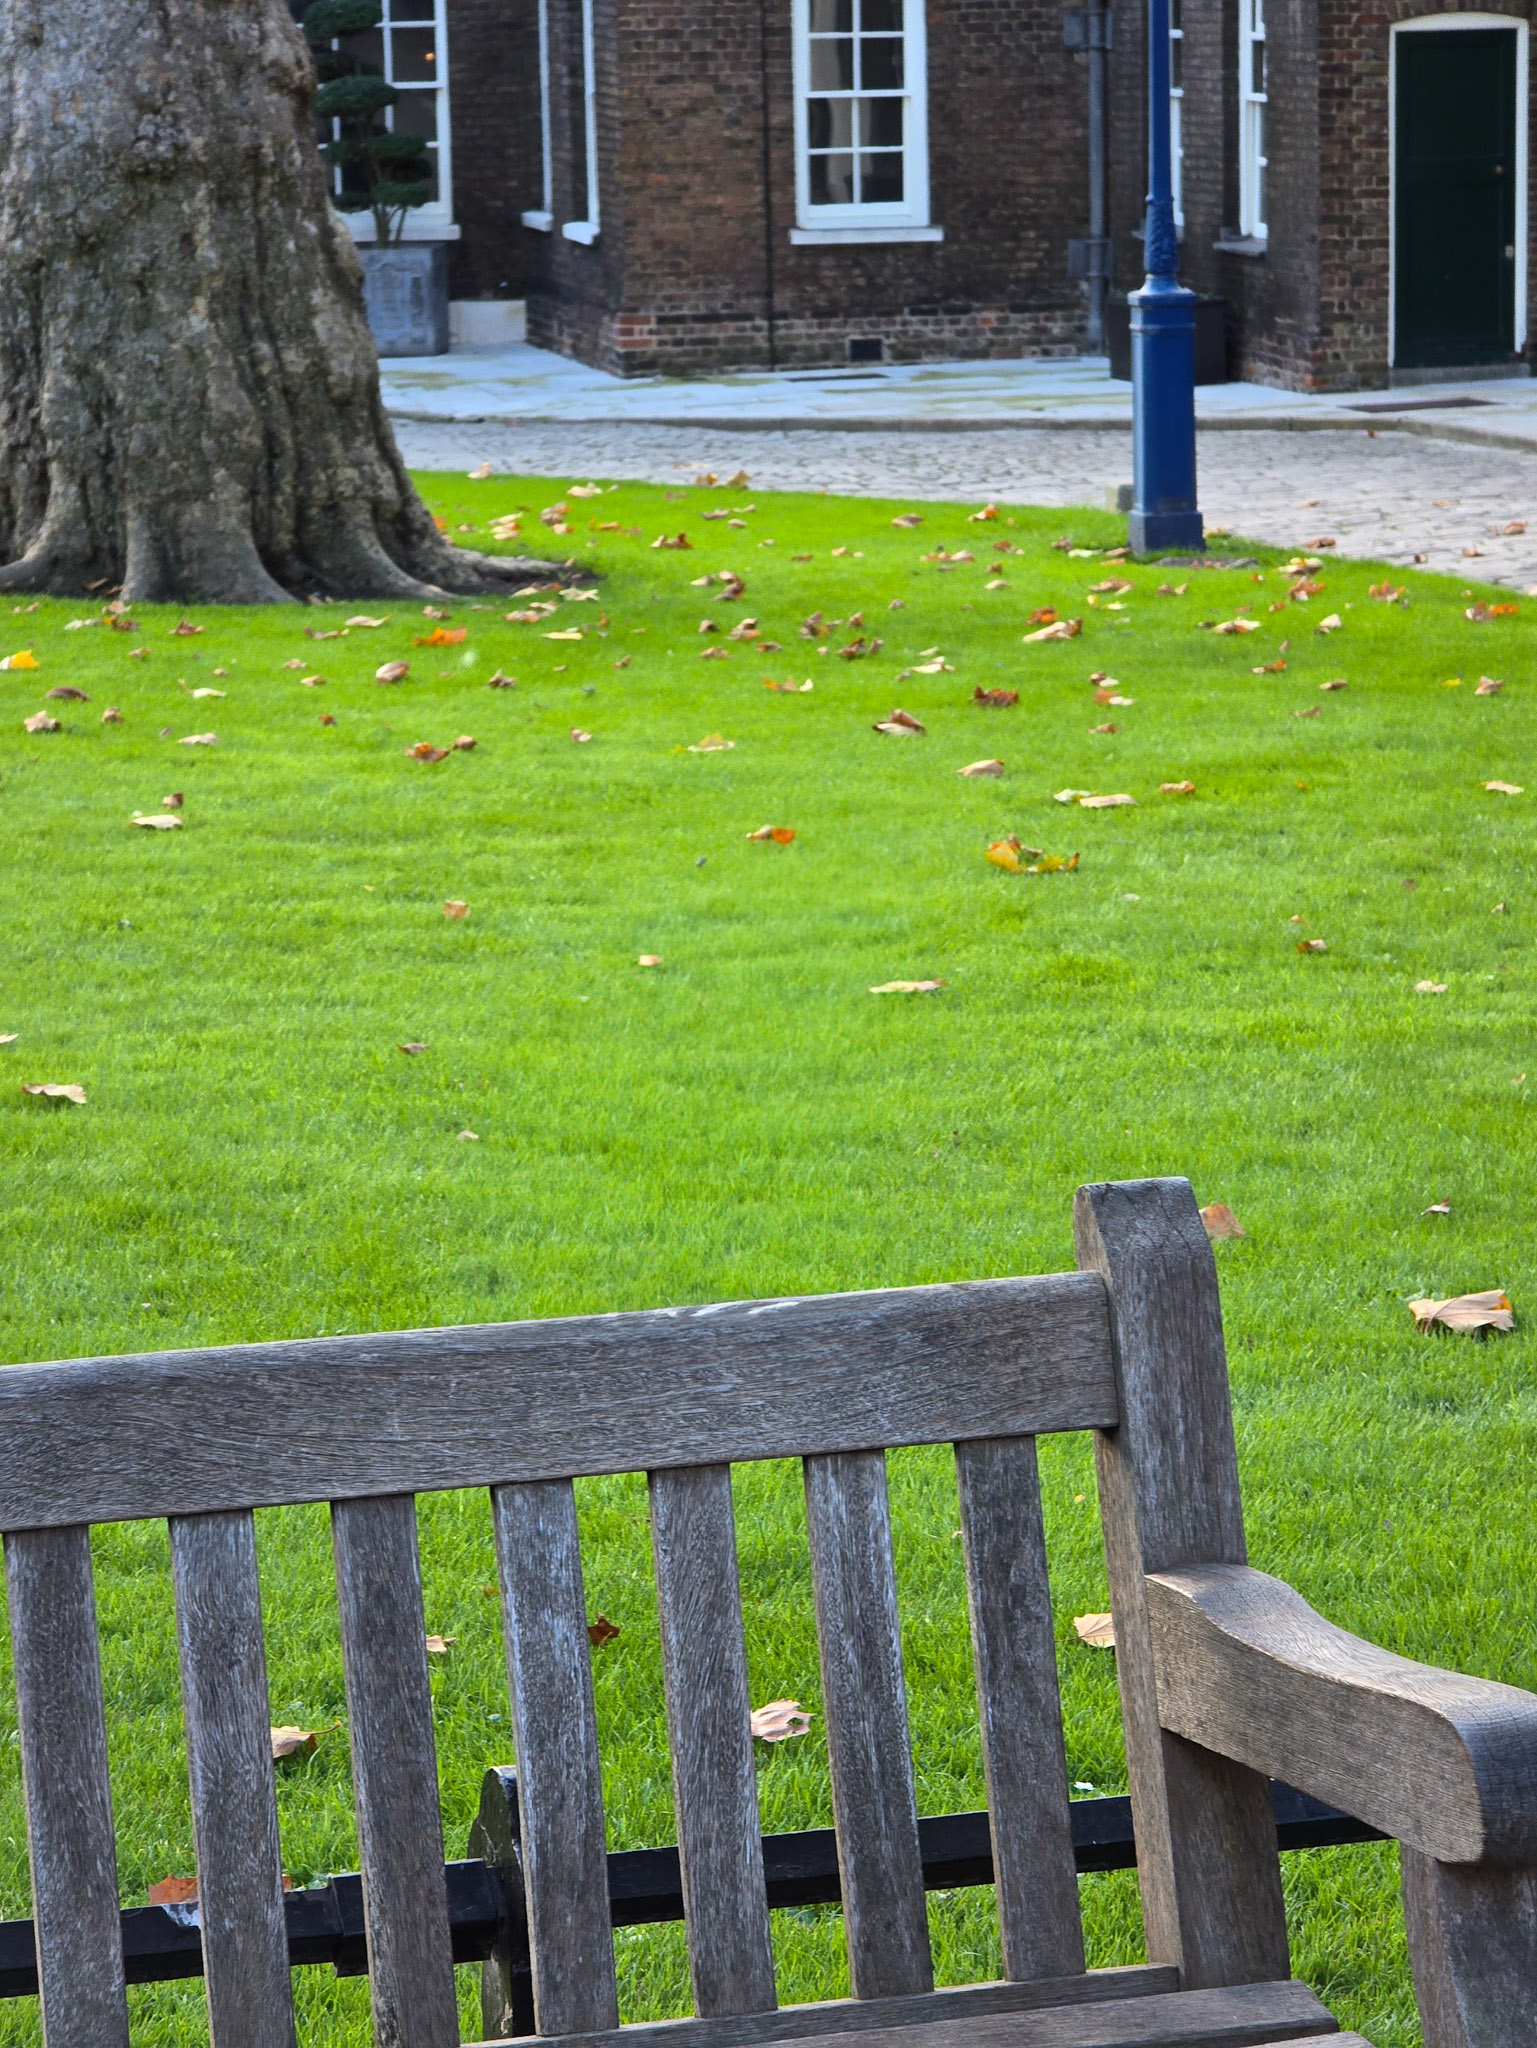
Here's the same image with some adjustments: the first one has been modified, the second one is missing the crow.
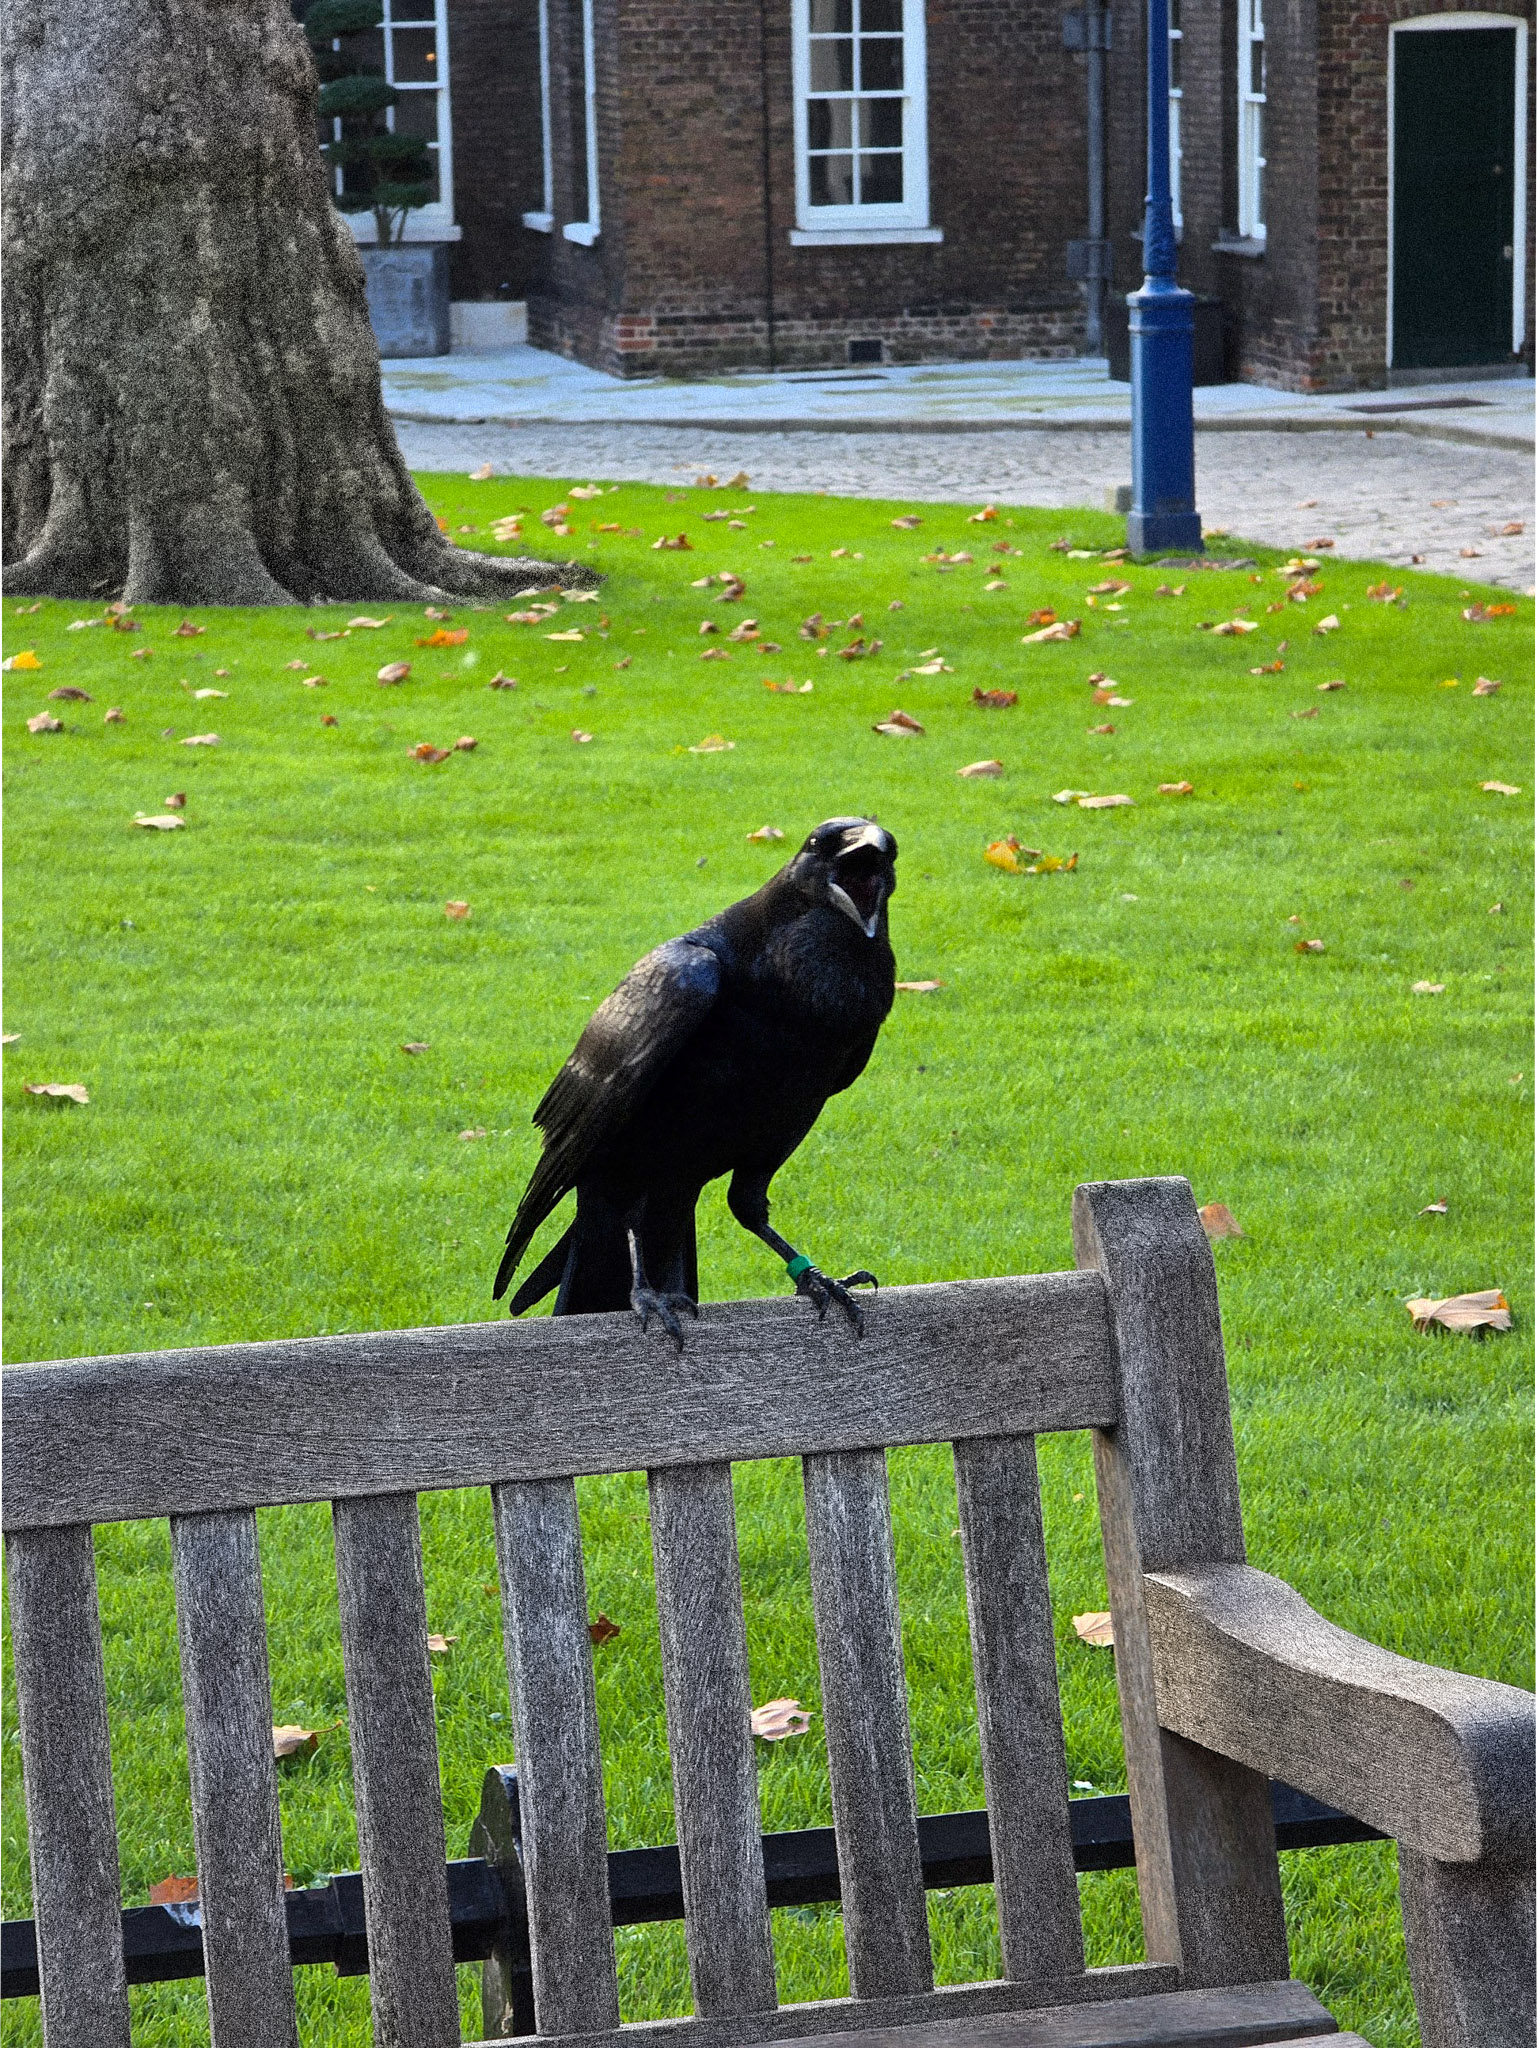
Guess which one has better metrics?
Note: As we've mentioned, quality is a subjective topic. Intuitively, I would vote that the first image is better because the main object is visible. However, if the noise or other artifacts in the image are absolutely unacceptable for you, you might prefer the second image.
Asking a neural network
Instead of relying solely on mathematically-derived metrics, we can leverage neural networks. There are many methods in the wild that are considered an alternative for SSIM. Numerous papers demonstrate that neural networks are capable of mimicking human perception better. And they are trained on images labeled by humans.
Let's pick one of these evaluation methods and apply it to the disappearing-crow problem.
Model things that the image with the crow present is better (0.52 vs 0.47, where a result closer to 1 is better). Now let's use this model in a slightly modified squirrel-compression exercise. This time, we resize a squirrel to 1000 × 1000 pixels (and cropping its beautiful tail), like this:

This is also closer to real-world tasks. Most images are small, though it looks like they're not compressed correctly. According to HTTP Archive, in 2025, the average size of images is around 1MB, which corresponds to a 2000 × 2000 pixel JPEG at average quality.
After creating 100 JPEGs and 100 AVIFs and comparing their qualities, AVIF still wins.
As a finishing touch, we'll draw several examples of our images to visually compare them. Let's look at very low-quality images first:

If you read the previous section, you already know why these images look this way. AVIF uses much larger tiles (which leads to big color patches) and filters that result in blurry fur. In the AVIF image, you can see that it has lost all the color detail and has tiny 8x8 blocks, which are the only blocks JPEG uses.
Now look at these two. Which one is better?


Answer
The first one is AVIF, the second one is JPEG. 35KB vs 97KB.
To illustrate the importance of accurate codec selection, let's run a few more comparisons:


Both images are 75 quality JPEGs. They look identical, ha-ha. However, the first one is 30% smaller. These images were generated by different codecs. The first one with MozJPEG, and the second one with the Chrome's built-in codec.
And one last example:

Both images were generated by the same codec, but with different codec parameters:
vips copy raw.png 'subsampling_off.jpg[Q=75, no-subsample]'
vips copy raw.png 'subsampling_on.jpg[Q=75,strip,interlace]'
Conclusion
Keep these tips in mind when compressing your images:
- In many cases, you don't need to compress images yourself. Consider using cloud services that allow on-the-fly image processing. They let you choose the image size, quality, and format you want to serve. They also allow serving the image in several formats, which can be quite cost-effective. For example, Cloudflare charges for multiple image formats as one. You will also get resizing and cropping out of the box. On-the-fly images are still configurable; you can set codec parameters by adding them to the URL.
- If you've never thought about image compression before, consider a very simple exercise: compress your images with MozJPEG using the parameters
Q=75,strip,interlace. Of course, you can adjust the quality to your needs. You'll probably be surprised by how little space your static files take up. - As the next level, compress your image to other formats and compare the results. You can serve multiple formats for different devices by using the
<picture>element. Try more modern formats like WebP or AVIF. - Don't forget to use progressive images when possible. However, don't use interlaced PNGs because they are bigger than non-interlaced ones. Actually, avoid using PNGs at all if you can. There are more efficient lossless formats like WebP or AVIF.
- When you compress your images, pay attention to the codecs you use. You can use compression tools like vips or sharp. Don't forget that you can pass parameters to the codec or tool. Experiment and find the solution that best suits your needs. You can also use online compression UIs like Squoosh or special plugins for your programs (such as Figma).
- If the image is not visible on the screen, don't load it! There are several useful techniques, from the super simple
loading="lazy"attribute to more advanced ones like the Intersection Observer API. - Collect statistics on your image usage. Proactively monitor and optimize your images.
Happy compressing!