HTML의 이미지
초창기 웹에는 텍스트만 있었고 꽤 지루했습니다. 다행히도 웹 페이지 안에 이미지 (및 보다 흥미로운 유형의 컨텐츠)를 삽입하는 기능이 추가되기까지는 오래 걸리지 않았습니다. 고려해 볼 수 있는 다른 유형의 멀티미디어가 있지만 단순한 이미지를 웹 페이지에 삽입하는 데 사용되는 <img> 요소로 쉽게 시작해 보겠습니다. 이 글에서는 기초 내용부터 심층적으로 사용하는 방법, <figure>를 사용하여 캡션을 주석으로 추가하는 방법, CSS 배경 이미지와 관련된 사용 방법을 자세히 설명합니다.
| 필요한 사전 지식: | 기본 컴퓨터 활용 능력, 기본 소프트웨어 설치, 파일 작업에 대한 기본 지식, HTML 기초 지식 숙지 (HTML 시작하기에서 설명) |
|---|---|
| 목표: | 간단한 이미지를 HTML에 삽입하고, 캡션을 사용하여 주석을 추가하는 방법과 HTML 이미지가 CSS 배경 이미지와 관련되는 방법을 배웁니다. |
웹페이지에 어떻게 이미지를 넣을까?
이미지를 웹사이트에 넣기 위해서 <img> 요소를 사용합니다. 이것은 텍스트 내용이나 클로징 태그를 갖지 않는 void element이며, src 와 alt가 있어야 유용합니다. src 속성은 페이지에 삽입하려는 이미지의 URL을 포함합니다. <a>요소의 href 속성과 마찬가지로 src 속성은 상대 URL 또는 절대 URL일 수 있습니다. src속성이 없으면 이미지 요소에 불러올 이미지가 없습니다.
참고 : 계속하기 전에 절대 URL, 상대 URL에 대해 복습하기 위해 URL과 path에 대한 기본 지침을 읽어보세요.
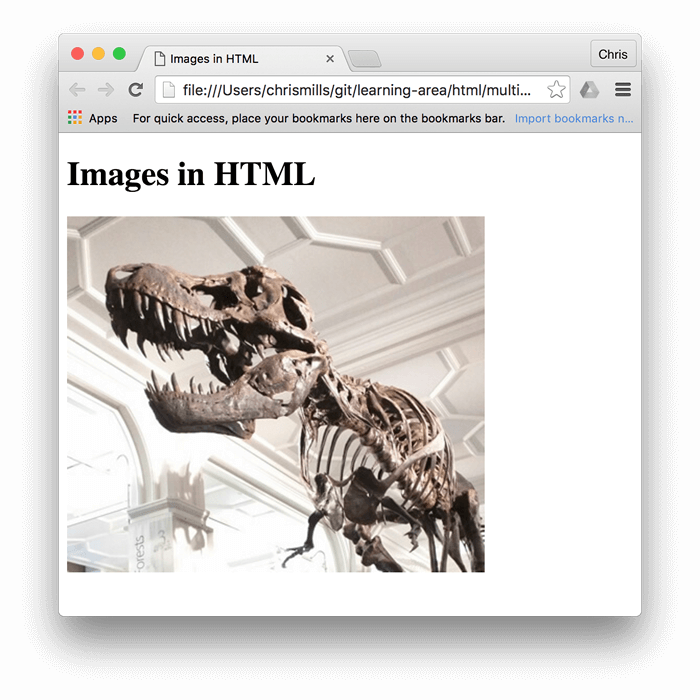
예를 들어, 당신의 이미지 파일 이름이 dinosaur.jpg이고, 당신의 HTML 페이지와 같은 디렉토리 아래에 위치한다면 이런 식으로 이미지를 삽입할 수 있습니다.
<img src="dinosaur.jpg" alt="Dinosaur" />
그 이미지가 HTML 페이지와 같은 디렉토리의 images 라는 하위 디렉토리에 있다면 아래 예제 등과 같이 삽입할 수 있습니다.
<img src="images/dinosaur.jpg" alt="Dinosaur" />
기타 등등.
참고 :
검색 엔진은 이미지 파일 이름을 읽고 SEO에 포함합니다. 따라서 그 내용을 설명하는 파일 이름을 사용하세요. img835.png 보다는 dinosaur.jpg가 낫습니다.
절대 URL을 사용해서 이미지를 삽입할 수도 있습니다. 아래의 예시를 확인하세요.
<img src="https://www.example.com/images/dinosaur.jpg" alt="Dinosaur" />
하지만 절대 URL을 사용하는 것은 추천하지 않습니다. 사이트에서 사용할 이미지를 호스팅 해야 하는데, 이는 간단한 설정에서는 웹사이트의 이미지를 HTML과 동일한 서버에 보관하는 것을 의미합니다. 또한 유지보수 측면에서 절대 URL보다 상대 URL을 사용하는 것이 더 효율적입니다. (사이트를 다른 도메인으로 이전할 때 새 도메인을 포함하도록 모든 URL을 업데이트할 필요가 없습니다). 고급 설정에서는 CDN (Content Delivery Network)을 사용하여 이미지를 전송할 수 있습니다.
이미지를 직접 만들지 않은 경우, 해당 이미지가 게시된 라이선스 조건에 따라 사용할 수 있는 권한이 있는지 확인해야 합니다. (자세한 내용은 미디어 애셋 및 라이선스를 참고해 주세요).
경고 :
다른 웹사이트에 호스팅 된 이미지를 허가 없이 src속성으로 가리키지 마세요. 이를 "핫링크"라고 합니다. 누군가 내 페이지를 방문할 때 이미지를 전송하는 대역폭 비용을 다른 사람이 지불하게 되므로 비윤리적인 행위로 간주됩니다. 또한 이미지가 삭제되거나 부끄러운 이미지로 변경되는 것을 제어할 수 없습니다.
절대 URL 또는 상대 URL을 사용한 이전 코드는 다음과 같은 결과를 보여줄 것입니다.
참고 :
<img> 와 <video> 와 같은 요소들을 대체 요소라고 하기도 합니다. 그 이유는 요소의 내용과 크기가 요스 그 자체가 아니라, 외부적인 요소(이미지나 비디오)에 의해 결정되기 때문입니다. 이에 대한 자세한 내용은 대체 요소에서 확인할 수 있습니다.
참고 : 완성된 예제들을 Github에서 확인하실 수 있습니다. (source code도 참고하세요.)
대체 텍스트
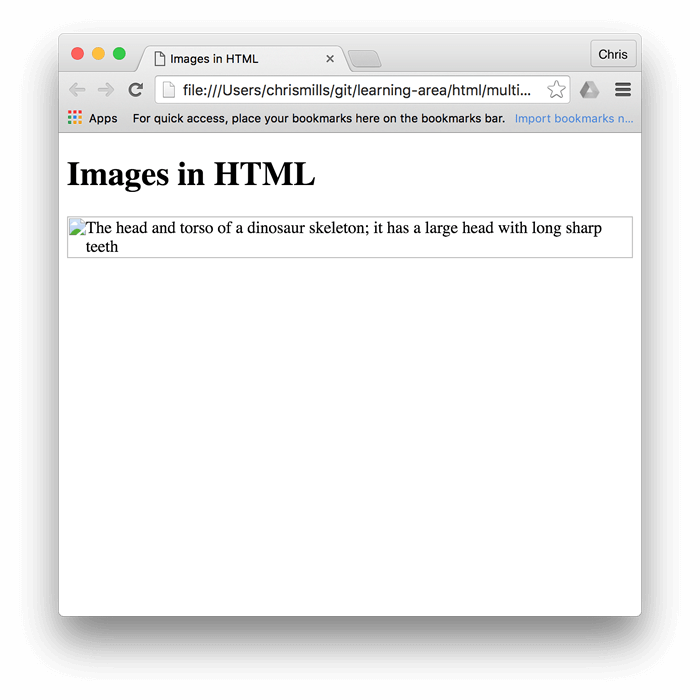
다음으로 살펴볼 속성은 alt입니다. 이 값은 이미지에 대한 텍스트 설명으로, 인터넷 연결이 느려서 이미지를 보거나 표시할 수 없는 경우 또는 렌더링 하는데 시간이 오래 걸리는 상황에서 사용할 수 있습니다. 예를 들어 위의 코드를 다음과 같이 수정할 수 있습니다.
<img
  src="images/dinosaur.jpg"
  alt="The head and torso of a dinosaur skeleton;
          it has a large head with long sharp teeth" />
alt 를 잘 작성하였는지 확인하기 위한 가장 쉬운 방법은 파일 이름을 고의로 틀리게 적는 것입니다. 예를 들어 이미지 파일의 이름을 dinosooooor.jpg 로 바꾼다면 브라우저는 이미지를 보여주는 대신, 대체 텍스트의 내용을 보여줄 것입니다.
대체 텍스트가 필요한 이유는 무엇일까요? 여러 가지 이유로 대체 텍스트가 유용할 수 있습니다.
- 사용자가 시각적인 장애를 가지고 있는 경우 스크린 리더가 그 내용을 읽어줄 수 있습니다. 사실 alt를 가지고 있다는 것만으로 대부분의 사용자들에게 유용합니다.
- 위에서 살펴봤듯이, 파일명을 잘못 적거나 경로 이름을 잘못 적었을 수도 있습니다.
- 아직까지도 텍스트만 지원되는 브라우저(예를 들면 Lynx)를 사용하는 사용자들이 있기 때문에 이미지 지원이 안되는 사용자도 있습니다.
- 텍스트를 제공하여 검색 엔진이 이를 활용할 수 있도록 할 수 있습니다. 예를 들어, 검색 엔진이 대체 텍스트와 검색어를 일치시킬 수 있습니다.
- 사용자가 데이터 전송량과 방해 요소를 줄이기 위해 고의적으로 이미지를 꺼 놓았을 수도 있습니다. 이러한 현상은 휴대폰과 대역폭이 제한적이거나 비싼 국가에서 흔히 볼 수 있는 현상입니다.
'alt' 속성 안에 정확하게 무엇을 써야 할까요? 이것은 이미지가 처음에 "왜" 존재하는지에 따라 다릅니다. 다시 말해, 이미지가 보이지 않는다면 무엇을 잃게 될까요?
- 꾸밈 요소. 꾸미는 이미지를 위해서 CSS 배경 이미지를 사용하는 것이 좋습니다. 하지만 HTML을 사용해야 한다면, 빈
alt=""를 추가하세요. 만약 이미지가 콘텐츠의 일부가 아니라면, 스크린 리더는 그것을 읽는 데 시간을 낭비하지 않을 것입니다. - 내용. 이미지가 중요한 정보를 제공한다면, 간단한
alt텍스트나 더 좋은 방법으로, 모든 사람들이 볼 수 있는 메인 텍스트에 동일한 정보를 제공하세요. 중복된alt텍스트를 작성하지 마세요. 만약 모든 문단이 메인 콘텐츠에 두 번 쓰여진다면 시각 장애인 사용자에게 얼마나 귀찮은 일일까요? 이미지가 메인 텍스트에 의해 충분히 설명되고 있다면,alt=""를 사용할 수 있습니다. - 링크. 만약 이미지를
<a>태그 안에 넣는다면, 이미지를 링크로 만들기 위해서, 여전히 접근 가능한 링크 텍스트를 제공해야 합니다. 이러한 경우에는,<a>요소 안에 작성하거나, 이미지의alt속성 안에 작성할 수 있습니다. 어떤 것이 더 좋은지는 당신의 상황에 따라 다릅니다. - 텍스트. 텍스트를 이미지 안에 넣어서는 안됩니다. 예를 들어, 메인 헤딩이 드롭 쉐도우가 필요하다면, 텍스트를 이미지 안에 넣는 대신에 CSS를 사용하세요. 하지만, 만약 이것을 피할 수 없다면,
alt속성 안에 텍스트를 제공해야 합니다.
본질적으로 핵심은 이미지를 볼 수 없는 상황에서도 사용 가능한 경험을 제공하는 것입니다. 이것은 모든 사용자들이 콘텐츠를 놓치지 않도록 합니다. 브라우저에서 이미지를 끄고 어떻게 보이는지 확인해 보세요. 이미지가 보이지 않는다면 대체 텍스트가 얼마나 유용한지 빨리 깨닫게 될 것입니다.
참고 : 더 많은 정보를 원한다면, 대체 텍스트 가이드를 참고하세요.
너비와 높이
width 및 height 속성을 사용하여 이미지의 너비와 높이를 지정할 수 있습니다. 이들은 단위 없이 정수로 제공되며, 픽셀 단위로 이미지의 너비와 높이를 나타냅니다.
여러 방법으로 이미지의 너비와 높이를 찾을 수 있습니다. 예를 들어, Mac에서는 이미지 파일의 표시 정보를 얻기 위해 Cmd + I를 사용할 수 있습니다. 우리의 예제로 돌아가서, 우리는 다음과 같이 할 수 있습니다.
<img
  src="images/dinosaur.jpg"
  alt="The head and torso of a dinosaur skeleton;
          it has a large head with long sharp teeth"
  width="400"
  height="341" />
너비와 높이를 사용하는 좋은 이유가 있습니다. 페이지의 HTML과 이미지는 별도의 HTTP(S) 요청으로 브라우저에 의해 가져온 별개의 리소스입니다. 브라우저가 HTML을 받자마자, 그것은 사용자에게 표시하기 시작합니다. 이미지가 아직 받아지지 않았다면(이것은 자주 발생할 것입니다. 이미지 파일의 크기는 HTML 파일보다 훨씬 크기 때문입니다.), 브라우저는 HTML만 렌더링하고 이미지가 받아지면 페이지를 업데이트할 것입니다.
예를 들어, 이미지 뒤에 텍스트가 있다고 가정해 봅시다.
<h1>Images in HTML</h1>

<img
  src="dinosaur.jpg"
  alt="The head and torso of a dinosaur skeleton; it has a large head with long sharp teeth"
  title="A T-Rex on display in the Manchester University Museum" />
<blockquote>
  <p>
    But down there it would be dark now, and not the lovely lighted aquarium she
    imagined it to be during the daylight hours, eddying with schools of tiny,
    delicate animals floating and dancing slowly to their own serene currents
    and creating the look of a living painting. That was wrong, in any case. The
    ocean was different from an aquarium, which was an artificial environment.
    The ocean was a world. And a world is not art. Dorothy thought about the
    living things that moved in that world: large, ruthless and hungry. Like us
    up here.
  </p>
  <footer>- Rachel Ingalls, <cite>Mrs. Caliban</cite></footer>
</blockquote>
브라우저가 HTML을 다운로드 받자마자, 브라우저는 페이지를 보여주기 시작할 것입니다.
이미지가 불러와지면, 브라우저는 이미지를 페이지에 추가할 것입니다. 이미지가 공간을 차지하기 때문에, 브라우저는 텍스트를 아래로 내려서 이미지를 위에 맞추어야 합니다.

텍스트가 이렇게 옮겨지는 것은 사용자를 매우 불편하게 합니다. 특히 이미 읽기 시작했다면 더욱 그렇습니다.
HTML에 이미지의 실제 사이즈를 명시했다면, width와 height 속성을 사용하여, 브라우저는 이미지를 다운로드하기 전에 이미지를 위한 공간이 얼마나 필요한지 알 수 있습니다.
이것은 이미지가 다운로드 되었을 때, 브라우저가 주변 콘텐츠를 옮길 필요가 없다는 것을 의미합니다.

이 기능에 대한 훌륭한 기사는 이미지에 높이와 너비를 설정하는 것은 정말 중요합니다를 참고하세요.
참고 : 그럼에도 불구하고, 우리가 말했듯이, HTML 속성을 사용하여 이미지의 실제 크기를 지정하는 것이 좋은 습관이지만, 이미지의 크기를 조정하는 데 사용해서는 안 됩니다.
만약 이미지 크기를 너무 크게 설정한다면, 이미지가 거칠거나, 흐릿하거나 너무 작아 보이고, 사용자의 요구에 맞지 않는 이미지를 다운로드 하는데 많은 대역폭을 사용하게 될 것입니다. 이미지는 또한 왜곡되어 보일 수 있습니다. 만약 올바른 종횡비를 유지하지 않는다면. 웹페이지에 올리기 전에 이미지 편집기를 사용하여 이미지를 올바른 크기로 조정해야 합니다.
만약 이미지의 크기를 조정해야 한다면, CSS를 사용하세요.
이미지 제목
링크와 마찬가지로, 이미지에 title 속성을 추가하여, 필요한 경우 추가적인 정보를 제공할 수 있습니다. 우리의 예제에서, 우리는 다음과 같이 할 수 있습니다.
<img
  src="images/dinosaur.jpg"
  alt="The head and torso of a dinosaur skeleton;
          it has a large head with long sharp teeth"
  width="400"
  height="341"
  title="A T-Rex on display in the Manchester University Museum" />
이것은 마우스를 올렸을때 툴팁을 제공합니다. 링크의 title과 같습니다.
그러나 이 방법은 추천되지 않습니다. title에는 접근성 문제가 많습니다. 주로 스크린 리더 지원을 예측할 수 없고, 대부분의 브라우저는 마우스를 올려야만 표시됩니다. (키보드 사용자는 접근할 수 없습니다). 이에 대한 자세한 내용은 title 속성의 시련과 고난을 참고하세요.
지원하는 정보 같은 경우 이미지에 첨부하는 것보다는, 본문에 포함하는 것이 좋습니다.
학습하기: 이미지 삽입하기
이제 당신의 차례입니다! 이 활동적인 학습 섹션에서는 간단한 이미지 첨부 연습을 할 수 있습니다. 당신은 기본적인 <img> 태그를 제공받았습니다. 우리는 다음 URL에 위치한 이미지를 삽입하길 원합니다.
https://raw.githubusercontent.com/mdn/learning-area/master/html/multimedia-and-embedding/images-in-html/dinosaur_small.jpg
전에 이미지에 핫링크를 넣지 말라고 했지만 이것은 학습 목적이기 때문에, 이번 한 번은 괜찮습니다.
다음 내용을 수행해 주세요.
- 대체 텍스트를 추가하세요. 그리고 이미지 URL을 잘못 입력하여 작동하는지 확인하세요.
- 이미지의 올바른
너비와높이를 설정하세요. (힌트: 200px 너비와 171px 높이입니다.) 그리고 다른 값들을 실험하여 어떤 효과가 있는지 확인하세요. - 이미지에
title을 설정하세요.
만약 실수했다면, 당신은 항상 Reset 버튼을 눌러서 초기화할 수 있습니다. 만약 당신이 정말로 막혔다면, Show solution 버튼을 눌러서 답을 확인하세요.
미디어 애셋 및 라이선스
이미지들(그리고 다른 미디어 자산들)은 여러 라이선스 타입들 아래에서 찾을 수 있습니다. 당신이 만드는 사이트에 이미지를 사용하기 전에 당신이 그것을 소유하고 있거나, 사용할 수 있는 권한이 있거나, 또는 소유자의 라이선스 조건을 준수하는지 확인하세요.
라이선스 타입 이해하기
웹에서 찾을 수 있는 일반적인 라이선스 카테고리들을 살펴봅시다.
모든 권리 보유
음악, 책 또는 소프트웨어와 같은 원본 작업물의 창작자들은 종종 그들의 작업물을 닫힌 저작권 보호 아래에서 발표합니다. 이것은 기본적으로 그들 (또는 그들의 출판사)이 그들의 작업물을 사용하는 (예를 들어, 표시하거나 배포하는) 독점적인 권리를 가지고 있다는 것을 의미합니다. 당신이 저작권 보호 이미지를 사용하고 싶다면, 당신은 다음 중 하나를 해야 합니다.
- 명시적으로 작성된 허가를 저작권 보유자로부터 얻으세요.
- 사용하기 위해 라이선스 비용을 지불하세요. 이것은 무제한 사용을 위한 일회성 비용("로열티 프리")이거나, "권리 관리"일 수 있습니다. 이 경우, 당신은 시간대, 지리적 영역, 산업 또는 미디어 유형 등에 따라 사용당 특정 비용을 지불해야 할 수 있습니다.
- 관할 지역에서 공정 사용 또는 공정 거래로 간주되는 경우에만 사용하세요.
저작권자들은 저작물에 저작권 표시 또는 라이선스 조건을 포함시키는 것이 필수적이지 않습니다. 저작권은 저작물이 유형화된 매체에 창작되면 자동으로 발생합니다. 그래서 당신이 온라인에서 이미지를 찾고, 저작권 표시나 라이선스 조건이 없다면, 가장 안전한 방법은 모든 권리가 보호되는 저작권에 의해 보호된다고 가정하는 것입니다.
허용
MIT, BSD, 또는 적절한 크리에이티브 커먼즈(CC) 라이선스와 같은 허용 라이센스에 따라 이미지를 공개하는 경우, 당신은 라이선스 비용을 지불하거나 사용을 위한 허가를 요청할 필요가 없습니다. 그럼에도 불구하고, 당신은 라이선스에 따라 다양한 라이선스 조건을 충족해야 합니다.
예를 들어 당신은 다음 내용들을 해야 할 수 있습니다.
- 이미지의 원본 소스에 대한 링크를 제공하고, 그것의 창작자에게 크레딧을 제공합니다.
- 변경사항이 있는지 표시합니다.
- 이미지를 사용하여 만든 모든 2차 작업물을 원본과 동일한 라이선스 하에 공유합니다.
- 2차 작업물을 공유하지 않습니다.
- 이미지를 상업적인 작업물에 사용하지 않습니다.
- 이미지를 사용하는 모든 릴리즈와 함께 라이선스의 사본을 포함합니다.
적용 가능한 라이선스를 확인하여 따라야 할 구체적인 조건을 확인해야 합니다.
참고 : "copyleft"라는 용어를 허용 라이선스의 문맥에서 만날 수 있습니다. Copyleft 라이선스 (예를 들어, GNU General Public License (GPL) 또는 "Share Alike" Creative Commons 라이선스)는 2차 작업물이 원본과 동일한 라이선스 하에 공개되어야 한다고 규정합니다.
Copyleft 라이선스들은 소프트웨어 세계에서 두드러집니다. 기본적인 아이디어는 Copyleft 라이선스를 받은 프로젝트의 코드로 만들어진 새로운 프로젝트(이것은 원본 소프트웨어의 "fork"라고 불립니다)도 동일한 Copyleft 라이선스 하에 라이선스 되어야 한다는 것입니다. 이것은 새로운 프로젝트의 소스 코드가 다른 사람들이 공부하고 수정할 수 있도록 공개되어야 한다는 것을 보장합니다. 일반적으로, 소프트웨어를 위해 작성된 라이선스들은 비소프트웨어 작업물을 위해 작성되지 않았기 때문에, GPL과 같은 라이선스들은 비-소프트웨어 작업물을 위한 좋은 라이선스로 간주되지 않습니다.
이전에 제공된 링크를 확인해서 다른 라이선스 유형과 그들이 지정하는 조건들을 읽어보세요.
공개 도메인/CC0
공개된 도메인은 때때로 "권리가 보호되지 않음"이라고 불립니다. 저작권이 적용되지 않으며 허가 없이 사용할 수 있고 라이선스 조건을 충족할 필요가 없습니다. 저작물은 저작권의 만료 또는 특정 권리 포기와 같은 다양한 방법으로 공개 도메인에 들어갈 수 있습니다.
공개된 도메인에 작업물을 놓는 가장 효과적인 방법 중 하나는 CC0라는 특정 크리에이티브 커먼즈 라이선스를 사용하는 것입니다. 이것은 명확하고 모호하지 않은 법적 도구를 제공합니다.
공개된 도메인을 사용할 때, 이미지가 공개된 도메인에 있는 것임을 증명하고 증명을 기록해 두세요. 예를 들어, 라이선스 상태가 명확하게 표시된 원본 소스의 스크린샷을 찍고, 라이선스 요구사항과 함께 이미지를 획득한 웹사이트에 페이지를 추가하는 것을 고려해 보세요.
허가된 라이선스 이미지 검색하기
당신은 당신의 프로젝트를 위해서 허가된 라이선스 이미지를 찾을 수 있습니다. 이미지 검색 엔진이나 이미지 저장소에서 직접 찾을 수 있습니다.
당신이 찾고 있는 이미지에 대한 설명과 관련된 라이선스 조건을 포함해서 이미지를 검색하세요. 예를 들어, "노란 공룡"을 검색할 때 "공개 도메인 이미지", "공개 도메인 이미지 라이브러리", "오픈 라이선스 이미지" 또는 비슷한 용어를 검색어에 추가하세요.
어떤 검색 엔진은 허가된 라이선스 이미지를 찾는 데 도움을 주는 도구를 가지고 있습니다. 예를 들어, Google을 사용할 때, 이미지를 검색하기 위해 "이미지" 탭을 클릭하고, "도구"를 클릭하세요. 그러면 툴바에 "사용 권한" 드롭다운이 나타납니다. 여기서 크리에이티브 커먼즈 라이선스 하에 있는 이미지를 검색할 수 있습니다.
이미지 레포지토리 사이트 (예: Flickr, ShutterStock, Pixabay)는 허가된 라이선스 이미지만 검색할 수 있도록 검색 옵션을 제공합니다. Picryl과 The Noun Project와 같은 사이트는 허가된 라이선스 이미지와 아이콘만 배포합니다.
이미지가 배포된 라이선스를 준수하려면 라이선스 세부 사항을 찾고 소스에서 제공하는 라이선스 또는 지시사항 페이지를 읽고 그 지시사항을 따르면 됩니다. 신뢰할 수 있는 이미지 레포지토리는 라이선스 조건을 명확하고 쉽게 찾을 수 있도록 합니다.
figures 및 figure captions으로 이미지에 주석 달기
캡션에 대해 말하자면, 이미지에 캡션을 추가하는 몇 가지 방법이 있습니다. 예를 들어, 다음과 같이 캡션을 추가하는 것을 막을 수는 없습니다.
<div class="figure">
<img
src="images/dinosaur.jpg"
alt="The head and torso of a dinosaur skeleton;
it has a large head with long sharp teeth"
width="400"
height="341" />
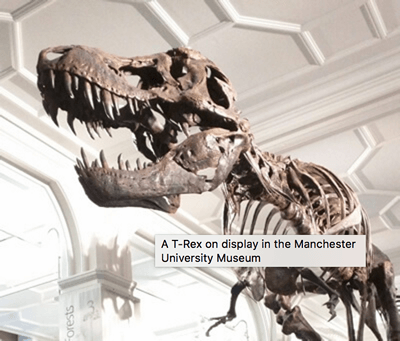
<p>A T-Rex on display in the Manchester University Museum.</p>
</div>
이것도 좋습니다. 당신이 필요한 컨텐츠를 포함하고 있습니다. CSS를 사용해서 멋지게 스타일링할 수 있습니다. 하지만 여기에는 문제가 있습니다. 이미지와 캡션을 의미론적으로 연결하는 것이 없습니다. 이것은 스크린 리더에 문제를 일으킬 수 있습니다. 예를 들어, 50개의 이미지와 캡션을 가지고 있을 때, 어떤 캡션이 어떤 이미지와 연결되는지 알 수 없습니다.
더 나은 방법은 HTML <figure>와 <figcaption> 요소를 사용하는 것입니다. 이것들은 정확히 이 목적을 위해 만들어졌습니다. 즉, figure에 대한 의미론적인 컨테이너를 제공하고, figure를 캡션과 명확하게 연결하는 것입니다. 위의 예제는 다음과 같이 다시 작성할 수 있습니다.
<figure>
  <img
    src="images/dinosaur.jpg"
    alt="The head and torso of a dinosaur skeleton;
            it has a large head with long sharp teeth"
    width="400"
    height="341" />

  <figcaption>
    A T-Rex on display in the Manchester University Museum.
  </figcaption>
</figure>
<figcaption> 요소는 브라우저와 보조 기술에게 캡션이 <figure> 요소의 다른 컨텐츠를 설명한다고 알려줍니다.
참고 :
접근성의 관점에서, 캡션과 alt 텍스트는 다른 역할을 합니다. 캡션은 이미지를 볼 수 있는 사람들에게도 도움이 되지만, alt 텍스트는 이미지가 없을 때와 같은 기능을 제공합니다. 따라서, 캡션과 alt 텍스트는 같은 것을 말해서는 안 됩니다. 왜냐하면 이미지가 없을 때 둘 다 나타나기 때문입니다. 브라우저에서 이미지를 끄고 어떻게 보이는지 확인해 보세요.
figure는 이미지일 필요가 없습니다. figure는 다음과 같은 독립적인 컨텐츠 단위입니다.
- 이미지의 의미를 간략하고 이해하기 쉬운 방식으로 표현합니다.
- 페이지의 선형 흐름에서 여러 곳에 배치될 수 있습니다.
- 본문을 지원하는 필수적인 정보를 제공합니다.
figure는 여러 이미지, 코드 스니펫, 오디오, 비디오, 방정식, 표 또는 다른 것들이 될 수 있습니다.
학습하기: figure 생성하기
이 학습하기 섹션에서, 우리는 이전 학습하기 섹션의 완성된 코드를 가져와서 figure로 바꾸길 원합니다.
<figure>요소로 감싸세요.title속성의 텍스트를 복사하고,title속성을 제거하고, 이미지 아래에<figcaption>요소 안에 텍스트를 넣으세요.
만약 실수했다면, Reset 버튼을 눌러서 다시 시작할 수 있습니다. 만약 정말 막혔다면, Show solution 버튼을 눌러서 답을 확인할 수 있습니다.
CSS 배경 이미지
이미지를 웹페이지에 삽입하기 위해 CSS도 사용할 수 있습니다. (JavaScript도 사용할 수 있지만, 이건 완전 다른 이야기 입니다). CSS background-image 속성과 다른 background-* 속성들은 배경 이미지의 위치를 제어하는 데 사용됩니다. 예를 들어, 페이지의 모든 문단에 배경 이미지를 놓기 위해, 다음과 같이 할 수 있습니다.
p {
  background-image: url("images/dinosaur.jpg");
}
임베디드 이미지는 HTML 이미지보다 위치 지정과 제어가 훨씬 쉽습니다. 그렇다면 HTML 이미지를 사용해야 할 이유가 무엇일까요? 위에서 언급했듯이, CSS 배경 이미지는 장식용입니다. 페이지에 예쁜 것을 추가하여 시각적으로 더욱 향상시키고 싶다면, 이것은 괜찮습니다. 하지만, 이러한 이미지는 의미가 없습니다. 텍스트 대체가 없으며, 스크린 리더에서도 보이지 않습니다. 이 부분에서 HTML 이미지가 빛을 발합니다.
요약하기: 이미지가 의미가 있다면, 콘텐츠 관점에서, HTML 이미지를 사용해야 합니다. 이미지가 순전히 장식이라면, CSS 배경 이미지를 사용해야 합니다.
참고 : CSS 배경 이미지에 대해서는 CSS 주제에서 더 자세히 배울 수 있습니다.
스킬을 테스트 하세요!
기사의 마지막에 도달했지만, 가장 중요한 정보를 기억하고 있나요? 다음으로 넘어가기 전에 이 정보를 기억하고 있는지 확인할 수 있는 몇 가지 테스트를 찾을 수 있습니다. 스킬 테스트하기: HTML 이미지를 참고하세요.
요약
여기까지입니다. 이미지와 캡션에 대해 자세히 알아보았습니다. 다음 기사에서는 웹 페이지에 비디오와 오디오 콘텐츠를 삽입하는 방법에 대해 알아보겠습니다.