使用 getUserMedia() 拍摄静态照片
本文介绍在支持 getUserMedia() 的计算机或手机上如何使用 navigator.mediaDevices.getUserMedia() 访问摄像机,并用其拍照。
如果你喜欢,你也可以直接跳转到演示。
HTML 标记
我们的 HTML 界面有两个主要的操作部分:流和捕获面板以及演示面板。它们俩都在它们自己的 <div> 中并排渲染,以便于添加样式和控制。
左边的面板包含两个组件:一个 <video> 元素,它将接收来自 navigator.mediaDevices.getUserMedia() 的流,以及用于用户点击以捕获视频帧的 <button>。
<div class="camera">
  <video id="video">视频流目前不可用。</video>
  <button id="startbutton">拍摄照片</button>
</div>
这很简单,当我们进入 JavaScript 代码时,我们将看到它们是如何紧密联系在一起的。
接下来,我们有一个 <canvas> 元素,捕获的帧被存储到其中,可能以某种方式进行操作,然后转换为输出图像文件。通过使用样式 display:none 将画布保持隐藏,以避免画面的混乱——用户不需要看到这个中间过程。
我们还有一个 <img> 元素,我们将在其中绘制图像——这是让用户看到的最终显示。
<canvas id="canvas"> </canvas>
<div class="output">
  <img id="photo" alt="捕获的图像会显示在这里。" />
</div>
这是所有相关的 HTML。其余的只是一些页面布局和提供一个返回页面链接的些许文本。
JavaScript 代码
现在来看看 JavaScript 代码。我们将把它分解成几个小的部分,使其更容易解释。
初始化
我们首先将整个脚本包装在匿名函数中,以避免使用全局变量,然后设置我们将要使用的各种变量。
(() => {
  const width = 320;    // 外面会对照片的宽度进行缩放
  const height = 0;     // 高度会基于输入的视频流进行计算

  const streaming = false;

  let video = null;
  let canvas = null;
  let photo = null;
  let startbutton = null;
这些变量分别是:
startup() 函数
当页面加载完成时,提供给 EventTarget.addEventListener 的 startup() 函数将会运行。此函数的作用是请求访问用户的网络摄像头,将用于输出的 <img> 初始化为默认状态,并建立从相机接收每帧视频所需的事件监听器,并在点击按钮捕获图像时作出反应。
获取元素引用
首先,我们参考我们需要访问的主要内容。
  function startup() {
    video = document.getElementById('video');
    canvas = document.getElementById('canvas');
    photo = document.getElementById('photo');
    startbutton = document.getElementById('startbutton');
获取流媒体
接下来的任务是获取媒体流:
navigator.mediaDevices
  .getUserMedia({ video: true, audio: false })
  .then((stream) => {
    video.srcObject = stream;
    video.play();
  })
  .catch((err) => {
    console.error(`An error occurred: ${err}`);
  });
在这里,我们调用 MediaDevices.getUserMedia() 并请求视频流(无音频)。它返回一个 promise,我们给它附加成功和失败情况下的回调方法。
成功回调接收一个 stream 对象作为输入。它是新视频的 <video> 元素的源。
一旦流被链接到 <video> 元素,我们通过调用 HTMLMediaElement.play() 开始播放。
如果打开流失败,则调用失败回调函数。在没有连接兼容的相机,或者用户拒绝访问时,则会发生这种情况。
监听视频开始播放
在 <video> 上调用 HTMLMediaElement.play() 之后,在视频流开始流动之前,有一段(希望简短)的时间段过去了。为了避免在此之前一直阻塞,我们为 video 加上一个 canplay 事件的监听器,当视频播放实际开始时会触发该事件。那时,视频对象中的所有属性都已基于流的格式进行配置。
video.addEventListener(
  "canplay",
  (ev) => {
    if (!streaming) {
      height = (video.videoHeight / video.videoWidth) * width;

      video.setAttribute("width", width);
      video.setAttribute("height", height);
      canvas.setAttribute("width", width);
      canvas.setAttribute("height", height);
      streaming = true;
    }
  },
  false,
);
这个回调什么都不做,除非它是第一次被调用;这是通过查看我们的 streaming 变量的值进行测试,这是第一次运行此方法时为 false。
如果这是第一次运行,我们会根据视频的实际大小,video.videoWidth 和要渲染视频宽度的宽度(witdh)之间的大小差异来设置视频的高度。
最后,通过在视频和画布上调用 Element.setAttribute() 来设置视频和画布的宽度(witdh)和高度(height),以使得两者相互匹配。最后,我们将 streaming 变量设置为 true,以防止我们无意中再次运行此设置代码。
处理按钮上的点击
为了在每次用户点击 startbutton 时捕获静态照片,我们需要向按钮添加一个事件监听器,以便在发出 click 事件时被调用:
startbutton.addEventListener(
  "click",
  (ev) => {
    takepicture();
    ev.preventDefault();
  },
  false,
);
这个方法很简单:它只是调用我们的 takepicture() 函数,在从流中捕获帧的部分中定义,然后在接收的事件上调用 Event.preventDefault(),以防止点击被多次处理。
包装 startup() 方法
startup() 方法中只有两行代码:
    clearphoto();
  }
这就是我们调用 clearphoto() 方法的地方,我们将在下面的清理照片框部分进行描述。
清理照片框
清理照片框包括创建一个图像,然后将其转换为可以显示最近捕获的帧的 <img> 元素使用的格式。该代码如下所示:
function clearphoto() {
  const context = canvas.getContext("2d");
  context.fillStyle = "#AAA";
  context.fillRect(0, 0, canvas.width, canvas.height);

  const data = canvas.toDataURL("image/png");
  photo.setAttribute("src", data);
}
我们首先得到对我们用于屏幕外渲染的隐藏的 <canvas> 元素的引用。接下来,我们将 fillStyle 设置为 #AAA(相当浅的灰色),并通过调用 fillRect() 来填充整个画布。
最后在此功能中,我们将画布转换为 PNG 图像,并调用 photo.setAttribute() 以使我们捕获的静止框显示图像。
从流中捕获帧
最后一个定义的功能是整个练习的重点:takepicture() 函数,其捕获当前显示的视频帧的作业将其转换为 PNG 文件,并将其显示在捕获的帧框中。代码如下所示:
function takepicture() {
  const context = canvas.getContext("2d");
  if (width && height) {
    canvas.width = width;
    canvas.height = height;
    context.drawImage(video, 0, 0, width, height);

    const data = canvas.toDataURL("image/png");
    photo.setAttribute("src", data);
  } else {
    clearphoto();
  }
}
正如我们需要处理画布内容的情况一样,我们首先得到隐藏画布的 2D 绘图上下文。
然后,如果宽度和高度都是非零(意味着至少有潜在有效的图像数据),我们将画布的宽度和高度设置为与捕获帧的宽度和高度相匹配,然后调用 drawImage() 将视频的当前帧绘制到上下文中,用帧图像填充整个画布。
备注:这可以利用 HTMLVideoElement 接口看起来像任何接受 HTMLImageElement 作为参数的 API 的 HTMLImageElement,将视频的当前帧渲染为图像的内容。
一旦画布包含捕获的图像,我们通过调用它的 HTMLCanvasElement.toDataURL() 将它转换为 PNG 格式; 最后,我们调用 photo.setAttribute() 来使我们捕获的静态框显示图像。
如果没有可用的有效图像(即宽度和高度均为 0),则通过调用 clearphoto() 清除捕获帧框的内容。
演示
HTML
<div class="contentarea">
  <h1>MDN——navigator.mediaDevices.getUserMedia(): 静态照片拍摄演示</h1>
  <p>
    此示例演示了如何使用内置的网络摄像头来获取媒体流,并从中获取图像,以使用该图像来创建一个
    PNG 图像。
  </p>
  <div class="camera">
    <video id="video">视频流目前不可用。</video>
    <button id="startbutton">拍摄照片</button>
  </div>
  <canvas id="canvas"> </canvas>
  <div class="output">
    <img id="photo" alt="捕获的图像会显示在这里。" />
  </div>
  <p>
    访问我们的文章:<a
      href="https://developer.mozilla.org/zh-CN/docs/Web/API/WebRTC_API/Taking_still_photos">
      使用 getUserMedia() 拍摄静态照片</a
    >以详细了解此处使用的技术。
  </p>
</div>
CSS
#video {
  border: 1px solid black;
  box-shadow: 2px 2px 3px black;
  width: 320px;
  height: 240px;
}

#photo {
  border: 1px solid black;
  box-shadow: 2px 2px 3px black;
  width: 320px;
  height: 240px;
}

#canvas {
  display: none;
}

.camera {
  width: 340px;
  display: inline-block;
}

.output {
  width: 340px;
  display: inline-block;
  vertical-align: top;
}

#startbutton {
  display: block;
  position: relative;
  margin-left: auto;
  margin-right: auto;
  bottom: 32px;
  background-color: rgba(0, 150, 0, 0.5);
  border: 1px solid rgba(255, 255, 255, 0.7);
  box-shadow: 0px 0px 1px 2px rgba(0, 0, 0, 0.2);
  font-size: 14px;
  font-family: "Lucida Grande", "Arial", sans-serif;
  color: rgba(255, 255, 255, 1);
}

.contentarea {
  font-size: 16px;
  font-family: "Lucida Grande", "Arial", sans-serif;
  width: 760px;
}
JavaScript
(() => {
  // The width and height of the captured photo. We will set the
  // width to the value defined here, but the height will be
  // calculated based on the aspect ratio of the input stream.

  const width = 320; // We will scale the photo width to this
  let height = 0; // This will be computed based on the input stream

  // |streaming| indicates whether or not we're currently streaming
  // video from the camera. Obviously, we start at false.

  let streaming = false;

  // The various HTML elements we need to configure or control. These
  // will be set by the startup() function.

  let video = null;
  let canvas = null;
  let photo = null;
  let startbutton = null;

  function showViewLiveResultButton() {
    if (window.self !== window.top) {
      // Ensure that if our document is in a frame, we get the user
      // to first open it in its own tab or window. Otherwise, it
      // won't be able to request permission for camera access.
      document.querySelector(".contentarea").remove();
      const button = document.createElement("button");
      button.textContent = "查看以上示例代码的实时演示";
      document.body.append(button);
      button.addEventListener("click", () => window.open(location.href));
      return true;
    }
    return false;
  }

  function startup() {
    if (showViewLiveResultButton()) {
      return;
    }
    video = document.getElementById("video");
    canvas = document.getElementById("canvas");
    photo = document.getElementById("photo");
    startbutton = document.getElementById("startbutton");

    navigator.mediaDevices
      .getUserMedia({ video: true, audio: false })
      .then((stream) => {
        video.srcObject = stream;
        video.play();
      })
      .catch((err) => {
        console.error(`An error occurred: ${err}`);
      });

    video.addEventListener(
      "canplay",
      (ev) => {
        if (!streaming) {
          height = video.videoHeight / (video.videoWidth / width);

          // Firefox currently has a bug where the height can't be read from
          // the video, so we will make assumptions if this happens.

          if (isNaN(height)) {
            height = width / (4 / 3);
          }

          video.setAttribute("width", width);
          video.setAttribute("height", height);
          canvas.setAttribute("width", width);
          canvas.setAttribute("height", height);
          streaming = true;
        }
      },
      false,
    );

    startbutton.addEventListener(
      "click",
      (ev) => {
        takepicture();
        ev.preventDefault();
      },
      false,
    );

    clearphoto();
  }

  // Fill the photo with an indication that none has been
  // captured.

  function clearphoto() {
    const context = canvas.getContext("2d");
    context.fillStyle = "#AAA";
    context.fillRect(0, 0, canvas.width, canvas.height);

    const data = canvas.toDataURL("image/png");
    photo.setAttribute("src", data);
  }

  // Capture a photo by fetching the current contents of the video
  // and drawing it into a canvas, then converting that to a PNG
  // format data URL. By drawing it on an offscreen canvas and then
  // drawing that to the screen, we can change its size and/or apply
  // other changes before drawing it.

  function takepicture() {
    const context = canvas.getContext("2d");
    if (width && height) {
      canvas.width = width;
      canvas.height = height;
      context.drawImage(video, 0, 0, width, height);

      const data = canvas.toDataURL("image/png");
      photo.setAttribute("src", data);
    } else {
      clearphoto();
    }
  }

  // Set up our event listener to run the startup process
  // once loading is complete.
  window.addEventListener("load", startup, false);
})();
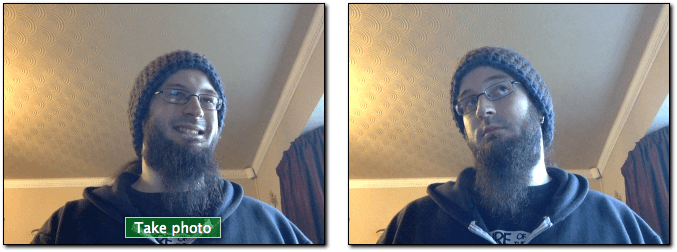
结果
过滤器的乐趣
由于我们通过从 <video> 元素中抓取帧来捕获用户网络摄像头的图像,因此我们可以非常轻松地将过滤器和有趣的效果应用于视频。事实证明,使用 filter 属性应用于元素的任何 CSS 过滤器都会影响捕获的照片。这些过滤器可以从简单(使图像黑白)到复杂(高斯模糊和色调旋转)。
你可以使用例如 Firefox 开发者工具的样式编辑器来播放此效果;有关如何执行此操作的详细信息,请参阅编辑 CSS 过滤器。
使用特定设备
如果需要,你可以将允许的视频源限定为特定的设备或特定的一组设备。要做到这一点,请调用 MediaDevices.enumerateDevices。若返回的 promise 兑现了一个 MediaDeviceInfo 对象(描述了可用的设备)数组,可以从中选取一个你想要允许的设备,并将对应的 deviceId 或 MediaTrackConstraints 对象的 deviceId 作为参数传入到 getUserMedia() 中。